Home / survival

survival

Keep your feet warmer with this tip from Intense Angler

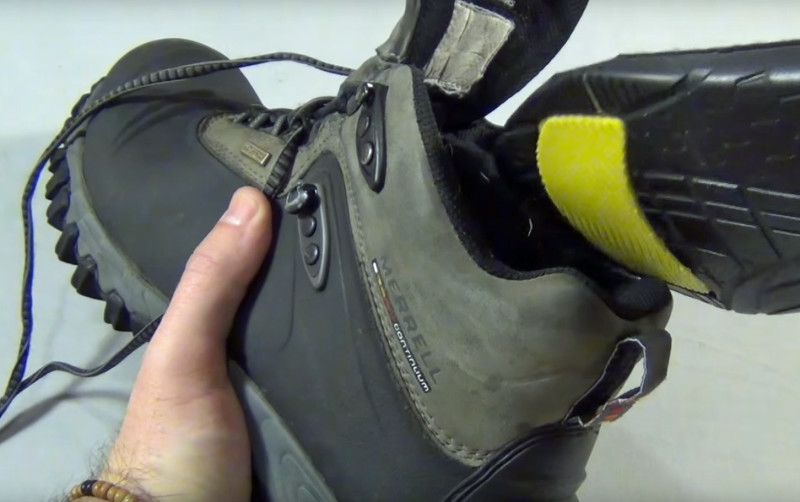
John Chlarson, a.k.a. Intense Angler has a great solution for cold feet this winter. If you need a boost to your winter footwear and you’re pinching pennies, drop by the dollar store – your feet will thank you.

With a marker, scissors and a cheap windshield heat reflector you can get cosier feet.

Start by removing your insole.

IA-insulation

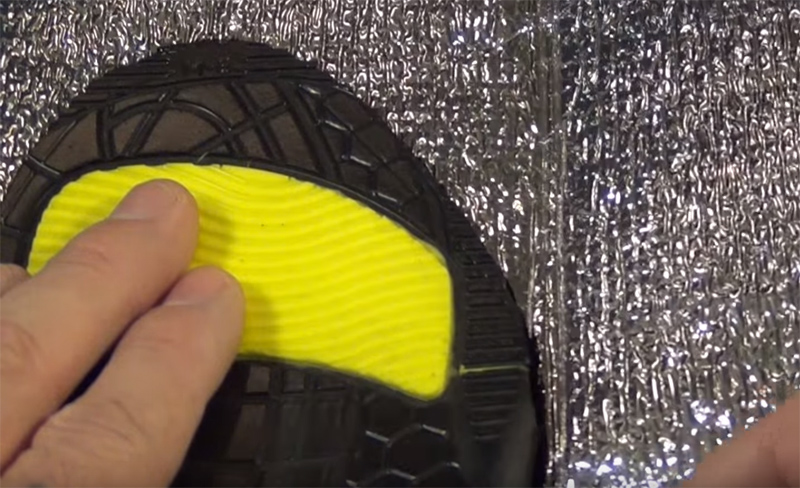
Next, trace a copy of your insole on the heat reflector, cut it out and insert it into your shoe!

IA-reflect

You gain more padding and at the same time you’re reflecting the cold down and the heat up.

Be sure to watch the whole video above for the full instructions. Let us know what do you think of this quick and brilliant tip from Intense Angler?

5 Clever uses for chapstick

If you’re a DIYer and you don’t watch Intense Angler’s excellent youtube channel, you need to head over and subscribe. John has grown his audience to 150000 subscribers with his popular “Tip of the Week” series. If you’re not convinced, then take at the video above as John demonstrates 5 impressive uses for chapstick… beyond the typical lip protection.

Here’s the list of what he tackles in the video for reference:

  • A DIY fire starter – Combine some chapstick with a cotton ball for an improvised and reliable firestarter.
  • An Improvised First Aid kit – Use the chapstick to cover and protect minor, topical injuries. It’ll keep it protected, clean and prevent minor bleeding. Make sure you use non-flavoured for this!
  • A gear lubricant – Chapstick is petroleum based, so it can be used to stop squeaks in gear and lubricate sticky zippers.
  • A Temporary Waterproofer – If you find a small leak in your gear, a temporary field repair can be done with chapstick. It’ll act as a temporary fix to prevent water seeping through the tent, jacket, pack or what have you.
  • An Emergency Candle – A surprisingly effective homemade, emergency candle lantern by twisting a cotton ball into a wick and coating it in the chapstick.

See More from Intense Angler and hook up with him on social media:


Practising some Knife Throwing

This weekend we went out for a paddle on a local lake and the kids wanted to see “daddy” throw a knife. It was a comical experience with moderate success. Happy Wednesday!

Always be careful with knives kids! Never throw when someone is in front of you. Never walk in front of someone that is throwing a knife!

10 Helpful Tips for Winter Backpacking Safety

With snowstorms and frigid temperatures taking hold across the country the past few weeks, many people have decided that it’s time to hang-up their backpacking gear for the next few months. While backpacking in the winter offers new challenges, the opportunity to have a trail all to oneself to enjoy the views and quiet can be too much for others to let pass. Winter backpacking does require a different skill set than 3 season backpacking, so before heading out it’s a good idea to brush up on some pointers to make your winter hikes a little safer.


  1. Layering: Having a good layering system is key to maintaining a comfortable temperature from morning to nightfall, no matter what the level of activity. Here are a few tips to help regulate body temperature throughout the day:
  • In the morning when activity level and temperature is low use a lot of layers. Once you get moving after breakfast remove just enough layers until you feel a little cool, but not chilled. Taking off too much, or not enough, can result in overheating, sweating, or losing heat, all of which lead to potential problems.
  • If you do stop after you’ve been moving for a while, be sure to add another layer to keep from getting chilled.
  • At the end of the day as your activity level decreases and temps drop, add as many layers as you think you’ll need to stay warm. It’s easier to remove layers to cool off than to warm up after you’ve been chilled.
  1. Ice crossing: Whether it’s a river or lake, being able to cross an icy body of water is a common occurrence in the winter. It’s difficult to tell how thick and stable ice might be, so test it out by using a ski pole or walking stick. Also, review techniques on how to save yourself or rescue a partner if someone falls through and other tips such as unclipping your hip belt and chest strap on your pack so you can quickly dump it if you should fall through the ice.


4235597518_7e00a7d0b1_z

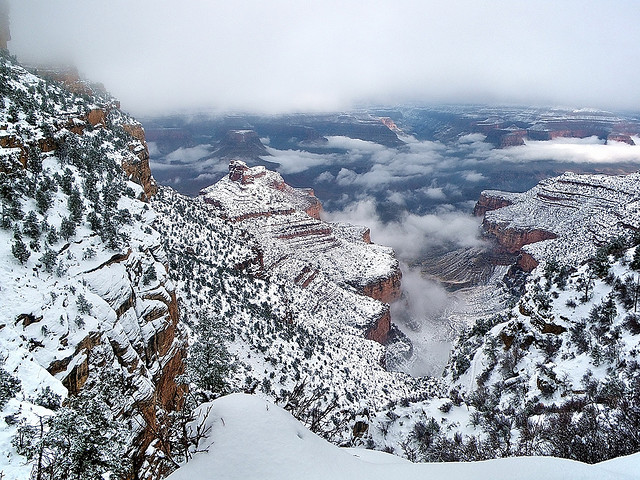
Bright Angel Trail: Alan English (https://www.flickr.com/photos/alanenglish/4235597518)


  1. Avalanche Safety: If traveling in avalanche prone areas, you’ll have to recognize potential avalanches spots, cross avalanche zones safely, and know personal and group rescue techniques. You’ll also need to think about what additional gear has to be carried to be properly prepared. It also doesn’t hurt to review some avalanche (http://www.justgetout.net/subaru/postAvalanche-ABCs-for-Snowshoers) basics (http://www.backpackinglight.com/cgi-bin/backpackinglight/avalanche-assessment-sawchuk.html#.VHESF2TF_6h) before you head out.
  2. First-Aid Techniques: Many of the same first-aid treatments carry over to winter from 3-season backpacking. But winter backpacking also requires that you know how to treat frostbite, snow blindness, and hypothermia, among others.
  3. Build an Emergency Shelter: If your tent sustains some serious damage or a day hike is suddenly interrupted by snowstorm, knowing how to make an igloo (http://samh.net/backpacking/blog/2012/01/how-to-build-an-igloo.html), snow cave (http://sectionhiker.com/how-to-build-snow-shelters/) or a snow pit (http://samh.net/backpacking/blog/2012/01/how-to-build-an-igloo.html) can be a lifesaving skill.
  4. Proper Nutrition: Hiking in cold and freezing temps requires to you consume more calories to keep warm and provide needed energy throughout the day. Eating complex carbohydrates and fats will give you the fuel to keep the body going all day. Here are a few quick eating tips:
    • Breakfast: Something quick, hearty, and easy so you don’t get chilly waiting for food to cook
    • Lunch: If you want to keep moving during the day, packing ready to eat options are good options, But if you prefer to take a break, taking time to cook a hearty meal can be nice break and give you added fuel for the day. Just remember to bundle up when you stop to cook.
    • Dinner: After a day of hiking, foods high in fats and complex carbohydrates are a good option to replenish lost calories and keep you warm at night.
    • Snacks: GORP, raisins, M&Ms are all still good options. Eat some protein before heading to bed. Protein is slow to digest and will create added heat while you sleep.
  5. Route Planning and Travel Time: With less daylight, snow covered trails, and sudden snowstorms, knowing the route is extra important in the winter. By spending a few minutes reviewing the map before you start the day can make hustling to the next campsite or finding a quick spot to set-up for the night a little less stressful.
  6. Shelter Set-up: Frozen ground and snow can add valuable minutes to setting up your tent. Knowing how to properly stake out the tent, using walking sticks or downed wood if needed, and properly packing the snow can prove invaluable during snowstorms or extremely cold temps. Remember that cold fingers and gloves also complicate the set-up process.


EvansSummit

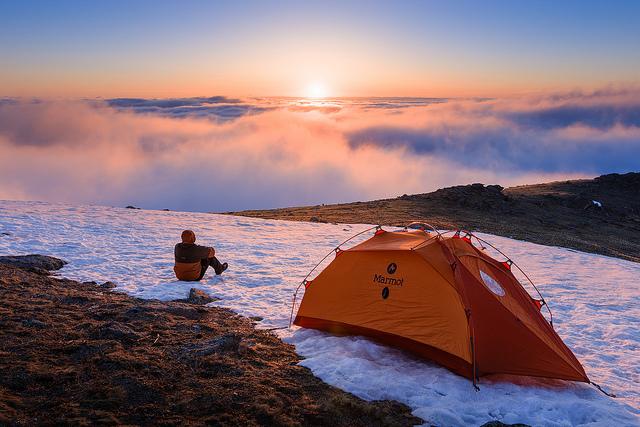
Evans Summit Fog: Casey McCallister (https://www.flickr.com/photos/cmccalli/9037463595)


  1. Gathering & Boiling Water: Dehydration is a problem in winter as the dry air can suck moisture from your body, so it’s important to know how to stay hydrated and warm. A simple tactic is to carry a thermos of warm water for coffee, tea, or cocoa that can keep your insides warm throughout the day. For drinking water, boiling can be the easiest method since filters can freeze and chemical treatments are not as effective in freezing temperatures. Remember that when melting snow to put some water at the bottom of the pot, otherwise you risk burning the pot and wasting fuel to melt snow.
  2. Leave No Trace Principles: With snow and freezing temperatures, leaving no trace takes a little extra effort and planning. It’s good to review the principles for winter backpacking (https://lnt.org/teach/winter-recreation).


With clear skies, fewer people, and snow covered views; those that do brave the cold swear that winter offers some of the best backpacking opportunities of the year. At the same time, there are new and potentially serious challenges. As long as you’re adequately prepared with the right knowledge and skills, you’ll be able to enjoy the next few months with a little less stress, more confidence, and a little more warmth.


[divide]


Byline: This guest post was provided by Ryan Rankin. Ryan currently lives in San Francisco but grew up fishing and running in the woods of Wisconsin. When he’s not busy with work, he tries to head into the Sierras for some rest and relaxation. You can follow more of his writings at The Amateur Outdoorsman (http://www.theamateuroutdoorsman.com/).


Survival Show Casting Call: Last Survivor

If you’re looking for your big break in the adventure television industry, or simply want to test out your uber survival skills, this may be what you’ve been waiting for.

I received a Casting Call email from Natalie x at Leftfield Entertainment for a new survival series. This one sounds pretty real and pretty serious to me. It isn’t the first time I was contacted for a survival themed series (I was contacted about a survival/prepper series that I didn’t want to touch), but this is the first one that I really want to apply for.

Doing some research, Leftfield entertainment has produced programs for The History Channel, Discovery, A&E amd National Geographic, so you know this is a serious offer. So what’s it about? Here is the Casting Call:

MAJOR CABLE NETWORK IS SEARCHING THE COUNTRY FOR SELF RELIANCE EXPERTS FOR A SURVIVAL EXPERIMENT LIKE NO OTHER…

In the real world, survival is not a game and there is little room for failure. Survival is a matter of self-reliance that cannot be faked.

Are you a TRUE survivor in every sense of the word? Is self-reliance a way of life for you?

Do you believe that the act of survival has become trivialized in popular culture today?

Do you want to prove that you have the skills, determination, willpower and strength to take part in THE ULTIMATE survival experience?

No gimmicks. No film crew. No games.  

From the producer’s who brought you Pawn Stars and American Restoration on The History Channel and Clash Of The Ozarks on Discovery comes the biggest survival experiment ever attempted. The series will feature a group of self-reliance experts as they battle the elements and fight to survive on their terms with nothing but what they can carry on their backs. Their mission: to survive alone in the wild and document their journey every step of the way.

Whether you’re an outdoorsman, homesteader, adventurist or survivalist, if you’re ready to take on the survival challenge of a lifetime, we want to hear from you!

To learn more, please email casting@leftfieldpictures.com with your name, contact information, a recent photo and a description of your self-reliance experience.
——-

So, Is this the show you’ve been waiting for?

I really like that it’s filmed by the participants. Of course the footage will be edited, but it seems like what happens will be in the hands of the participant. The survival will be a lot more authentic, the challenges will be real. If I was ever to apply for a show, this is the one I would feel most comfortable participating in it.

So, what do you think? Would you watch this show? Are you going to send in your application to participate? How long do you think you (or I for that matter) would last on a show like this?

Survival Saturday #9 – How to make a thorn hook

Back in the day, thorn hooks were all the rage. Check out this simple tip as we make a hook out of an acacia thorn.

Check out the video below to see how we did it:

Survival Saturday #8 – How to start a fire using Dryer Lint

Another simple butuseful trick to add to your arsenal. This one makes use of common household waste (a.k.a. dryer lint). It ignites instantly and burns for long enough to get a good blaze going.

Watch the video below and try it out!

Survival Saturday #6 – How to start a fire with Birch Bark

My dad always talked about how birch bark was one of the best tools to start a fire. We would choose it because it was high in resin and would burn even when wet. Add to that the fact that it burns for a long time and you can really see it’s hard to beat.

Check out the video below where I start a fire using birch bark ignited by a fire steel (ferrocerium rod).

Survival Saturday #6 – Finding North Using a Watch

Have you ever been lost without a compass? There are lots of ways to orientate yourself in the back country. This one uses a compass (digital or analog) to calculate North. Check it out and let us know if you’ve ever been lost in the back country or front country and how you got out safely.

Survival Saturday Giveaway

As a special thank you to all our youtube fans, we’re having a giveaway of some pretty awesome gear from Cold Steel via www.BuyLighters.com. Rules are simple:

Giveaway is open to North America. Winners must be 18 years or older or have parental consent.

Here’s what we’re giving away:

  • Cold Steel Tomahawk
  • Cold Steel Special Forces Shovel
  • Cold Steel Kudu folding knife
  • Cold Steel FGX Boot Blade 1 (only available to US Winners for legal reasons)

Winners can choose from available prizes based on order of random draw choosing. Items may show very minor use (I couldn’t help myself!)

Don’t forget to check out the video below and head over to www.BuyLighters.com and use the discount code: BCSURVIVAL.


Windmill Trekker Stormproof Lighter

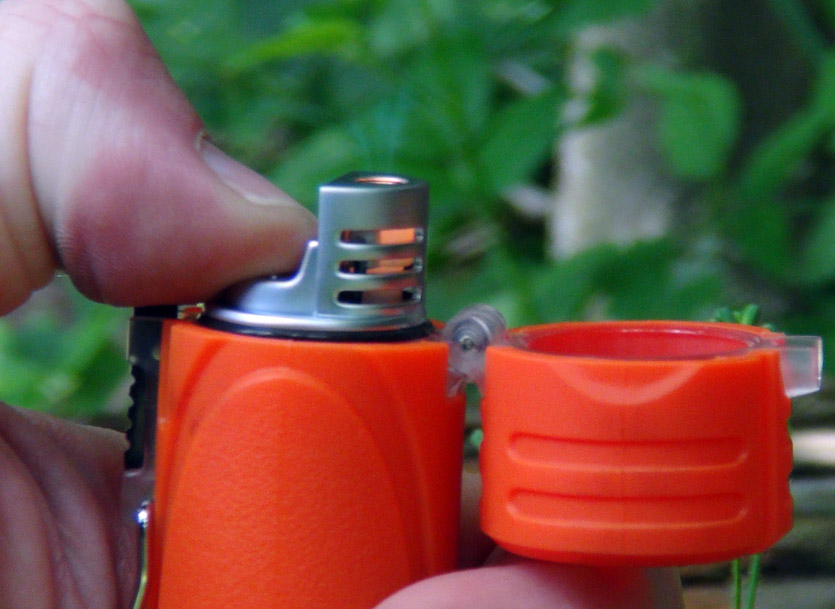
I’m all for bushcraft and survival skills. When I start a fire I try to use a fire steel or matches. That said, I know that in an emergency when I most need to light a fire, that will be the most challenging time. It’s hard to beat a good lighter, and the Windmill Trekker is certainly that and more.

Cold fingers and shivering can make a simple task like lighting a match incredibly difficult. The reality is that that’s when lighting a fire needs to be the easiest task you do. Add wind and wet and you’re in for a cold night.

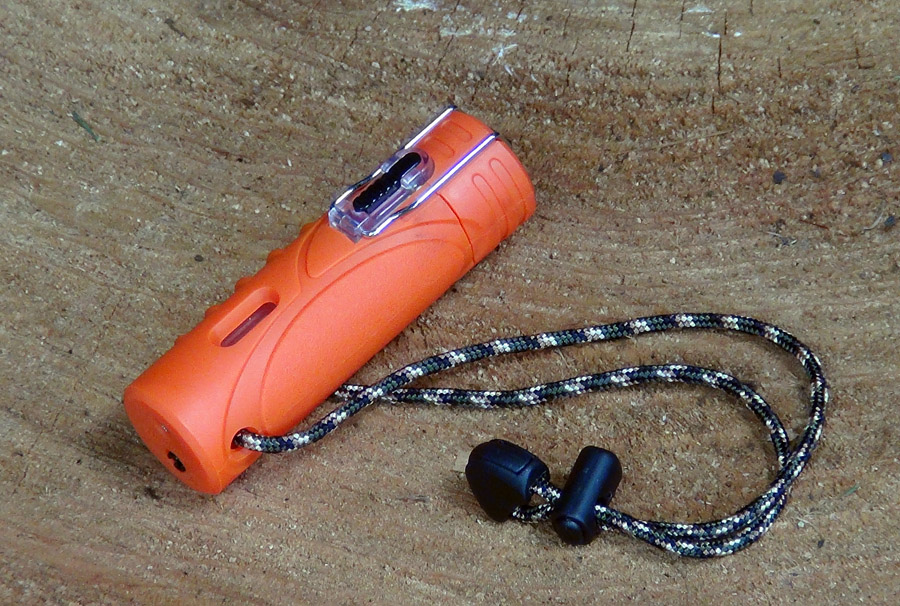
The Trekker by Windmill is a high capacity Butane lighter with a lot of features:

  • Piezo-Electric Ignition
  • High capacity reservoir (1000 ignitions per fill)
  • Windproof flame to 70-80 MPH
  • Water Resistant (5 O-rings)
  • Adjustable flow flame
  • Refillable
  • Rubberized case
  • Dual locking case (external bale and trigger button)
  • Lanyard
  • Weight: 2.5 oz
  • Size: 3.7″ x 1.5″
  • Available in Blaze Orange, Clear, Matte Black, Smoke Black, and Smoke Green
  • MRSP: $55
  • $49.99 at www.buylighters.com

WT1

The first thing you’ll notice when you pick one of these up is that it is not your cheap gas station lighter. It’s a heavy duty piece of survival gear. I see this as a great resource for hunters, fishermen, backpackers and anyone that needs a reliable, practically bombproof method of starting a fire.

The windproof flame is incredibly impressive. Even in high winds the lighter springs to life in a split second and stays on. I can’t help thinking that it’s more of a torch than a lighter. My wife gives me that look as I too often snap it open and “test” it inside.

Finding the fuel flow adjust on the bottom was another treat for me. It quickly went from efficiency mode to look at how quickly I can burn this stump mode… where it has stayed.

The lighter 5 rubber O-rings to keep water out and all the insides moisture free. It’s a nice feature for me, considering that one of my lighters failed for half a day on a recent backpacking trip after I spilled a few drips from my water bottle on it.

WT2

The dual locking makes my wife and I feel more comfortable having it in the house. One has to flip the bale and then press the button underneath it to get access to the lighter. It’s a minor detail, but it will definitely keep moisture and little hands out.

The lanyard is another useful feature. It’s designed for one’s wrist, and I can’t help but think tha a neck sized lanyard would serve a bit better for this sort of device.

I really like the Orange Blaze colour. The olive colour may look cooler, but I like to have my gear easy to find and hard to lose.

Nothing has failed on me yet, but I’d like to see a bit of a sturdier hinge, as that’s probably going to take the most abuse.

Let’s get the biggest elephant out of the room, price. It’s $50 (only $45 with the coupon code BCSURVIVAL). That may seem a lot for a lighter, but it isn’t your typical throw away lighter. It’s a high capacity work horse that you can rely on in the back country and emergency situations where an easy to start flame makes the difference.

So, What do you take with you to light fires on your adventures? Have you ever had your ignition source fail on you for any reason? Please leave a comment down below.


I was given the aforementioned lighter to review by http://www.buylighters.com to get word out about their site, which offers a range of high quality lighters. They are offering a 10% discount on any purchase using the code: BCSURVIVAL. Check them out and check out the Windmill Trekker.

Survival Saturday #5 – Finding North Using Shadows

If you get lost and you don’t have a compass then you’ll need to find a way to navigate out safely. One of the ways to do that is using the shadows from the sun. Take a look at the video below and leave a comment below if you’ve tried this trick before!

Have you ever been lost? How did you find your way back out?