Home / review (page 11)

review

Explorer Box DIY – by Compact Camping Concepts

How often has it been the case that a start of a weekend camping trip is the long, drawn out ordeal of fitting a few days of food, clothing, shelter and accessories the trunk of a midsize car? The scenario is no doubt familiar. Pack… repack… unload…reload… all in the quest of maximizing the amount of stuff we can fit in the trunk while still being able to both close the trunk and fit people inside the car too.
In times like those I have often bantered about the question of a trailer. Like a giant trunk that gets pulled behind the car, and able to store camping gear so that we can all get on the road that much sooner. Or, the occasional thought of the tent trailer, all the storage we need plus shelter all in one! The trouble of course (besides learning how to back up with a trailer attached) is that trailers are terribly expensive, and the more you would like the trailer to do, the quicker the price seems to rise. Besides cost, trailers can present an additional challenge to the DIYer because buying a trailer takes the fun out of doing it yourself and no matter how you go about it, the concept of building a trailer from scratch and have it roadworthy (the first time!) is a complex and daunting task.

So what is a DIYer to do?


If buying a complete trailer is simply too far out of your price range, if the joy of seeing a job completed with your own hands is worth the time, and if you’ve got the basic woodworking equipment and skills, then an Explorer Box may be for you. The Explorer Box – DIY is an instruction manual put together by Compact Camping Concepts ( http://www.compactcampingconcepts.com/) and serves a DIYer’s guide on building you very own rolling camp box ready for any outdoor adventure.


The Explorer box is effectively a camp box that you can attach to a trailer and take with you. It contains storage, organization and allows a bit of space so that you can have a miniature galley if needed. The key of course, is that it is only the instructions; the building part is up to you. The instructions are detailed enough that even if you only do basic woodworking, you can assemble the whole thing by following the step by step guide. At the same time, the basic building principles are laid out such that if you see a need to modify or change the configuration of the box, it would be fairly straightforward to do so. As an extra attraction, the Explorer Box is sufficiently small and light that even a smaller vehicle can pull it around.


I am not a particularly great woodworker, but when reading the instructions I could readily follow the instructions provided and was left without much doubt about what would be required to make this box a reality. Scattered throughout the book are useful tips on materials that cut down weight, glue technique as well as advice on paint and finishers. It really drives home that this box is an investment. I appreciated the section on on how to maintain your finished trailer so that it lasts as long as possible as with any project that we invest time and money it, it has to be worth the effort in the long term!


Emphasized in the book is the fact that no matter what, this box is not something to be built using spare parts found on the side of the road. It is a huge investment in time and while less than buying an assembled trailer, is still going to cost enough money that you don’t want to make mistakes. The book is outlined with the goal in mind of making sure you will only have to build it once. The beginning of the book lays out the tools that you need in order of Basic tools (translation: required kit), nice additions (translation: not required, but will make it easier) and miscellaneous items that may be needed depending on what you choose to do. As some parts are harder to find than others, Compact Camping Concepts maintains an online store to fill in those gaps. The manual has helpful tips on choosing out woods, latches, and hinges that are needed to build the box as well as the finishes that you will need to make your box ready for the outdoor weather. 

Once the materials are laid out, the instructions turn to ‘repeatable’ items that will be performed over and over again. Finally, the assembly begins from the floor up until, at the end you have your assembled box. The last pieces deal with optional add-ons such as mounting a tent to the top of the trailer and the wiring of the trailer itself. Throughout the book are multitudes of pictures and diagrams to that you can feel confident that you are following the steps correctly.


When going through this manual, it was very clear to me that you must read the whole manual before getting started. The primary reason is that the instructions are outlined according to a 4’ x 6’ trailer frame. If you are working with larger or smaller trailer, or if you have to buy or assemble a trailer, you might have to make changes.  Also, if you were thinking about putting a tent on the box (as shown on their site), you must factor in how you are going to do it as this area is also not covered in the manual. These are all mentioned in the introduction, which highlights the importance of reading the whole manual.


Conclusions


The Explorer Box manual is an excellent way providing a DIYer a solid framework to bring the task of building a durable, useful trailer to a level that anyone with basic woodworking ability can feel like this is well within the realm of possibility. Even I, with my barely basic skills and lacking a couple of the required tools feel like I could successfully put this together. The instructions are detailed, with pictures, diagrams, and tips that will help make it a successful one time job. The instructions are specific enough that if you build it to exactly the manual’s instructions you will be successful, and at the same time the instructions are intuitive enough that you can modify them according to your needs. Reading the manual carefully and practicing the repeated instructions will make sure you are successful in building. As the book says, “Measure twice, cut once.”


Don’t worry if you’re not a DIYer, Compact Camping Concepts has pre-made options to take care of your camping needs! 

Are you a DIYer? Does this type of project appeal to you?
by Graeme A.
The Outdoor Adventure
Manual provided to us by Compact Camping Concepts


Sea to Summit Ultra-Sil Kitchen Sink – Gear Review

Now, the next time we go backpacking with our two small children and my husband groans under the weight of his pack and asks whether I had packed the kitchen sink, I will be able to grin and say “yes! But that’s not the weight you are feeling.”

This sink is going to go with me every time I go backpacking from now on in. It is one of those items that the minute I saw it I knew I needed it. If the children run through every single item of clothing- no problem! If there is a pile of dishes to be washed (including a pot that needs to be soaked in hot water) – no problem! If my feet are sore after a long hike and I want to soak them in warm water – no problem! Dog bowl, personal bathing or simple water storage – the uses are endless!


This bucket is large enough to wash a pile of dishes or a shirt and a pair of socks and small enough to slip in anywhere in your pack (or even your jacket pocket). At only 1.7 oz this is an easy one to pack.

The sink is made from exceptionally strong nylon fabric and with well constructed seems, is as tough as they come. Sharp rocks, prolonged use – this sink can handle it! As the material is impermeable it is very easy to keep clean, just wipe or rinse and hang to dry (or if there is no time to dry, just stuff it back into it’s sack).

The micro stuff sack seams are fully taped to avoid unwanted leakage and has directions on the back on how to fold the sink properly.

The sink’s set up is a flick of the wrist and getting it back into the stuff sack is a work of moments.

Fill the sink near a water source and then use the convenient handles to carry it back to camp. I was very surprised at how much water it holds (10 liters) and how easy it was transport. I filled it with cold water before heading to where the hot water was boiling and found that I could have added a lot more water! The small package is deceiving in how much volume it can carry!

If using hot water, first put cold water into the sink before adding the hot (it can handle water temperature up to 140°F / 60°C). It is safe to use detergent but not bleach (who takes bleach backpacking anyway?!).

The Derlin stainless steel stiffener ring keeps the sink completely stable even in uneven or sloping ground. As the base is broader than the top it won’t tip over even if nudged with a foot.

The reinforced Hypalon carry handles are comfortable and make the transportation (even when the sink is carrying over two gallons of water) simple. Now there is no excuse to dump dirty and soapy water near the water source when there is such a simple solution! Carry the water as far as you need to and without getting wet!

This is a must have item in any backpacking gear. Being able to easily transport a large volume of water and store it in a stable container is invaluable. When things get dirty, it’s great to have something that makes it easy to clean up!

by Thamar A.
The Outdoor Adventure Team

Gear Provided by Sea To Summit

Adventure Medical Kits Ultralight / Watertight Medical Kit .7 – Gear Review


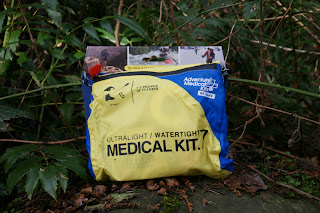
It goes without saying that it is far better to practice safety and prevention than to have to use first aid. Those of us with young ones in tow must especially take extra precautions and preventative measures to ensure the safety of our children, as we guide them in understanding safe discovery of the outdoors. However, many times medical complications occur of which no amount of safety and forethought could have prevented.  Sometimes, as I lay out what to pack I realize it’s mainly an assortment of emergency medical gear for any possible backcountry disaster scenario I might have thought up as I lay awake in the night.  It’s a good thing my husband is able to reign me in, and I am currently able to minimize our ‘portable emergency room’ to a mere bulging gallon-sized zip-lock bag. I realize I’ve still got some minimizing to do. Unlike my bulging gallon-sized ziplock, the Adventure Medical Kits Ultralight and Watertight Medical Kit .7 weighs only 8 oz. and measures 6.5″ x 8.5″ x 2″. As you can imagine, when I received it I picked it up and then looked in the box for the rest of it. I’m just not so sure I’m cut out for this ‘Ultralight’ business. My husband, on the other hand is thrilled to leave the huge zip-lock bag at home and grab the AMK Medical Kit .7 for his trips with the guys.

The proprietary DryFlex™ bags of the AMK Medical Kit .7 claim to be water-tight. So, I put this claim to the test by putting the whole kit in the kitchen sink for a while; I then proceeded to forget about it. I came back a few hours later to find it still bobbing happily in the water. While the outer bag was wet, the inner plastic bag held the contents dry inside. While the inner bag plastic doesn’t seem to be of the best quality, it does do its job. To maintain the water-tight seal, one would need to ensure that the zip-lock style seal at the top is thoroughly pressed together after each use.


Here is what is included in the kit, sealed up inside the proprietary DryFlex™ bags:


Bandage Materials
3 Bandages, Butterfly Closures
2 Dressings, Non-Adherent, Sterile, 3″ x 4″
1 Bandage, Conforming Gauze, 2″
5 Bandages, Adhesive, Fabric, 1″ x 3″
2 Dressings, Gauze, Sterile, 2″ x 2″, Pkg./2
3 Bandages, Adhesive, Fabric, Knuckle
2 Dressings, Gauze, Sterile, 3″ x 3″, Pkg./2 

Bleeding
1 Gloves, Nitrile (Pair),
Hand Wipe 

Blister / Burn
1 Moleskin, Pre-Cut & Shaped (11 pieces) 

Duct Tape
1 Duct Tape, 2″ x 26″ 

Fracture / Sprain
1 Bandage, Elastic with Velcro, 2″ 

Instrument
3 Large Safety Pins
1 Splinter Picker/Tick Remover Forceps 

Medication
2 After Bite Wipes
2 Antihistamine (Diphenhydramine 25 mg)
1 Aspirin (325 mg), Pkg./2
3 Ibuprofen (200 mg), Pkg./2 

Wound Care
4 After Cuts & Scrapes Antiseptic Wipes
3 Triple Antibiotic Ointment, Single Use
3 Alcohol Swabs
1 Tape, 1″ x 10 Yards
1 Tincture of Benzoin Topical Adhesive


In addition to this thorough kit, one might want to add a few additional items such as altitude or antidiarrheal medications, snake-bite kits, or other gear to fine-tune for your specific location or medical needs. While this thought process has certainly encouraged me to over-pack, careful consideration of risks should not be ignored. Knowing the terrain, climate, and creatures are essential for the customization of your personal medical kit.


But, as it turns out the Adventure Medical Kits Ultralight and Watertight Medical Kit .7 is a convenient way to carry the essential medical gear needed for 1-2 people for a short low-risk weekend trip. Designed for adventure-seeking enthusiasts and the inevitable bumps, cuts, and bruises that come with exploring the unknown, this watertight kit is a sensible addition to your day pack, diaper bag, bike pannier, purse, or whatever you might have on you when the urge for adventure strikes.


What essentials do you carry in your lightweight medical kit? Does the Adventure Medical Kits Ultralight and Watertight Medical Kit .7 include something you don’t? We would love to hear your input, so please comment, share on Facebook, and send us a tweet!


Reviewed By:
Tabea B
The Outdoor Adventure Team


Gear provided by Adventure Medical Kits

AlpineAire Foods Freeze Dried Food Pouches – Food Review

This past weekend a group of friends and I did a quick overnight backpacking trip to the Ozette Triangle on the Olympic Coast. We were blessed with clear blue skies and warm temperatures for our 9.4 mile roundtrip hike with sea stacks, deer, sea lions, and ocean scenery for as far as you can see.

I was set for with food for the weekend with my freeze dried meals from AlpineAire Foods. Their meal pouches can be used for quick lunches or dinners and with so many assortments, variety is rarely an issue. AlpineAire Foods offers a limited number of instant gluten-free meals and a large selection of individual items. Over the weekend I had a chance to try out some of their gluten free options, so I hope this review is helpful for those with gluten free requirements.


Up for review today:

1.       Black Bart Chili with Beans & Beef (GLUTEN FREE!) Weighs 6 oz and makes two 1 cup servings.

2.       Texas BBQ Chicken with Beans (GLUTEN FREE!) Weighs 5.5 oz and makes two 1 cup servings.

3.       BananasFoster (GLUTEN FREE!)  Weighs 4 ounces and makes two 1 cup servings.

4.       Blueberry Honey Granola with Milk (Contains Milk & Wheat) Weighs 6.5 oz and makes two 1 cup servings.


After our hike in to camp, we set up our tents as far as we possibly could from the hordes of school children on a ‘Spring Break Adventure Camping Trip.’ We hunkered down and I quickly boiled water with my MSR Reactor Stove System. After removing the small white colored oxygen absorber packet inside the pouch, I poured the required 2 cups into the Black Bar Chili with Beans & Beef pouch. I gave it a careful but thorough stir, and sealed it back up so that it could cook for the next 10-12 minutes. I can’t really remember what I did in those 10-12 minutes. I probably threw rocks at stuff, stoked the fire, or made fun of my brother in law. It was probably all of the above. I always like to wait the full extent of the time, as there are few things as disappointing as biting into incompletely cooked freeze dried food. OK, there are actually a lot of things more disappointing but that’s beside the point. Just don’t shortchange yourself from the full extent of flavor goodness by being too hasty.

As a Texan boy I know a thing or two about chili, so my standards are fairly high when it comes to traditional southern food. Now that my review has hopefully gained credibility in your eyes I will continue. With spoon in hand I proceeded to devour the Gluten Free Black Bart Chili with Beans & Beef. I was pleased with the consistency, as it has the texture of chili one would make at home – complete with beefy chunks and plenty of spicy beans. At first I worried about upsetting my stomach, as usually spicy food can make for an unpleasant atmosphere for my fellow tent mate and anyone who dares to hike downwind. But, much to the joy of all those around, the only waft in the breeze was of the cool salty air billowing in from the ocean that night. Overall, I felt satisfied with the allotted portion and comforted on a cold night with my belly full of delicious Gluten Free Black Bart Chili with Beans & Beef.


Let’s fast forward through the night to breakfast time the next morning. I could slow this down and tell you about how well I slept in the Adventure Medical Kits Escape Bivy that night, but you can just read all about it here. So, there I sat on the log eating Blueberry Honey Granola with Milk. Now most would just add the required ¾ cup cold water and call it granola, but I like to add ¾ cup hot water and call it porridge. Somehow, I just feel like it sticks to my ribs better that way. Knowing I have a warm breakfast helps me get out of the tent on the cold mornings too. Now, because this is a review I get to say whatever I want. So here’s my whatever: it’s bland. While I felt full and ready to tackle the trail, I also felt like I should have packed some brown sugar to sprinkle on top. I felt it just needed a little something extra.

Pack up camp. Hike. Hike. Hike. Scenic view. Stop. Lunch Time. (That’s my version of another fast forward.)


On the menu for lunch is Gluten Free Texas BBQ Chicken with Beans.  As with most pouch foods, I removed the oxygen absorber packet, added 2 cups boiled water, and waited 12 minutes. To be honest, I kind of eyeballed the water pouring it in this time, and think I might have added too much. The consistency was rather soupy, but again, that might have been my fault. I did enjoy scooping out the chunks of chicken and found them to be enjoyable, but was decidedly disappointed by the overall flavor of the meal. Like the granola, it just needed a little something extra, but this time a little brown sugar wouldn’t have sufficed. In the end I just felt obligated to finish the meal, and let’s just say I added a little something extra to the wafts in the breeze this time around.


Now before you think I’m a Negative Nancy, pause and consider my review of the Gluten Free Bananas Foster Dessert Meal. This meal only required ¾ cup of boiling water, but still required the full 12 minutes to cook in the pouch. AlpineAire describes this dessert as sliced bananas, cinnamon, and brown sugar that swim in a delicate vanilla sauce. Having never had Bananas Foster before, all I could do was glance down at the brown mush and then shrug my shoulders and dig in. The taste was a fairly sweet, banana-y flavor and the texture was chunky and chewy. As I continued to eat I realized that I had not mixed it as well as needed, and had to remind myself to pay more attention to getting deep down into the corners next time. Having the correct utensil can make all the difference. My short little spork can be such a nuisance for mixing freeze dried meals, leaving me licking sauce off my hand and yet evidently clumps of powder still evade me. We ate this as a group snack, but it ended up being more of a spork feeding frenzy. The only complaint was that some weren’t waiting their turn in the spork line-up. It almost got crazy.


Take a look at the AlpineAire website and keep their freeze dried food options in mind as you prepare for your next adventure. These meals are also perfect to keep in any of your home or car survival kits. Be sure to take a peek at the whole section dedicated to those who seek Gluten Free options. With all of their variety of selections, there is sure to be a flavor you will enjoy! Thank you AlpineAire for the opportunity to review a sampling of your freeze dried meals.


Reviewed By:
Tim B
The Outdoor Adventure Team

The SOL Origin™ Surivival Tool by Adventure Medical Kits – Gear Review

The SOL Origin™ is an awesome concept and cool piece of gear for the realm of survival kits. The SOL Origin™ is the lightest, most space efficient, and most durable survival kit on the market. Weighing only 6.25oz and measuring 3.875″ x 2.75″ x 1.5″, this ABS- plastic waterproof case can fit easily in the palm of my hand.

Incredibly, the list of tools integrated into the hard case is actually quite expansive. 

Here is what the SOL Origin™ has to offer:

1.       TinderQuik fire starting tinder

2.       150lb-test braided nylon cord

3.       Mil-spec stainless steel wire

4.       Emergency sewing kit

5.       Fishing kit

6.       Flip-up Rescue Flash signal mirror with retro reflective aiming aid

7.       One-hand-operable Fire Lite fire starter

8.       Removable liquid-damped compass

9.       Fully-functional AUS-8 drop-point folding blade knife

10.   Ultra-bright LED light integrated into the knife handle

11.   100db rescue whistle

12.   Backcountry expert Buck Tilton’s survival instruction manual

But, what is a review unless you put it to the test, right? So, I took the SOL Origin™ with me this past weekend on a short overnight backpacking trip to the Ozette Triangle on the Olympic Coast. While I did not use all of the gear included within the SOL Origin™, I do have a few comments on the tools which came in handy during our short 9.4 mile overnight trip. Of course, we were a far cry from a survival situation, in which the gear within the SOL Origin™ would be most utilized.

The SOL Origin™ fit easily into one of my small side pockets on my pack, which I usually rarely use. In the event that I would slip on the rocks and land on the gear didn’t worry me as the SOL Origin™ keeps its contents secure and dry in the ABS- plastic waterproof case. In the event of a drop the SOL Origin™ did not bust open as some small cases tend to do, but instead the hinged clasp remained securely clipped against the body of the case retaining the small tools safely inside.


At one point I slid the SOL Origin™ into my cargo pocket on my pants, to see if it would hinder my hiking abilities or jiggle around in my pocket too much. It’s always best to keep survival gear on one’s self instead of the pack, anyway. While it was noticeable, I did not feel it was an inconvenience to carry it in my pants cargo pocket because it is so lightweight. I can’t say the same thing for my former emergency survival kit that we usually pack on our trips, that thing wouldn’t fit in my pocket even if I divided it in half as it’s basically a gallon sized ziplock packed full of weird and wonderful emergency gear. It was reassuring that in the event that I needed to ditch my pack for any reason, I would still have what it takes to survive perfectly packed in my pocket. That’s where that handy 62+ tip sheet would come in handy, because honestly I don’t actually know much about wilderness survival. Only a short 7 years ago I was perfectly happy sitting in my perfectly air conditioned living room in Houston playing video games, and the only hiking I did was to the fridge to get another Coca-Cola. Then I met my adventure-loving wife from the Pacific Northwest who turned my whole world upside down and introduced me to this thing they call ‘Fresh Air’. Even if you go outside in Houston, it doesn’t exist. But, my point is that I better not lose that little folded sheet or I’m doomed.


I took charge making the fire for the night. I whittled a piece of dry drift wood into shavings and slivers using the SOL Origin™ AUS-8 drop-point folding blade knife, then I made a small little fingerling ditch in the fire pit. I placed the SOL Origin™ fire starting tinder perpendicularly across the little ditch, creating a teepee of shavings and slivers over it. Using the one-hand-operable Fire Lite fire starter I lit the SOL Origin™ fire starting tinder, which quickly caught fire and remained in flame for at least 2 minutes. In that time the shavings and slivers caught fire, and I was able to add small sticks and then larger ones to create quite the cozy fire in under 10 minutes. I also had used the one-hand-operable Fire Lite fire starter to light my MSR Reactor stove to boil my water for my AlpineAire freeze dried meal that night. The SOL Origin™ AUS-8 drop-point folding blade knife was also perfect for slicing off the top of my AlpineAire pouch like a ninja.


While I do not have some hardcore survival story to tell you how I used every piece of equipment you should rest assured that with the SOL Origin™ in hand you have what it takes do something useful with your time until rescue teams are able to find you. Just be sure to signal with the handy flip-up Rescue Flash signal mirror with retro reflective aiming aid and the 100db rescue whistle to help them find you. The whistle really works, while we didn’t want to test it out on our trip my wife made sure to empty her lungs into it only 2 inches away from my sleeping face this morning. I’m not a morning person, but when my ears are still tingling 2 minutes after I’ve woken up then I’m really not a morning person. She made up for it with a steaming latte delivered to my desk with a smiley face drawn on top with caramel sauce. I’m a sucker for those kinds of things, and she knows it.


I can’t wait to test out the SOL Origin™ fishing kit when we hike to a fresh water lake on our next trip. I’ll give you an update when I do. Have you had a chance to try out the SOL Origin™? Please comment, share, tweet, and connect with us on Facebook! We would love to hear from you.

Reviewed by:

Tim B
The Outdoor Adventure Team

Sport Science T-shirt – Gear Review

When doing any sort of exertion, wearing a normal t-shirt can leave us first feeling hot and sticky with sweat, and then, once our bodies have cooled off, feeling cold and clammy, with the sweat making the shirt stick to our skin. Adding to the discomfort is the concern for anyone’s nostrils that may be standing downwind.
Optimally, we’d like our shirts to stay dry while moving that heat and moisture from our sweat away from our bodies so we can stay cool while exerting ourselves and comfortable while standing still.
In an effort to create this perfect shirt, Sport Science steps in with their Smarter Basics line of T-shirts. The Smarter Basics t-shirt use an engineered 85% Polyester / 15% cotton moisture wicking fabric that promises to deliver the comfort of a cotton shirt with the quick-drying features of artificial fabrics. In addition, the shirt is treated a “Freshguard” in order to keep the shirt smelling fresher for longer.
We were able to spend some time testing a smarter basics T-shirt. Here’s what we found:

Look

The Smarter Basics T-shirt has a very straightforward and simplistic look to it. Compared with other dri-fit shirts, this one really does look like a ‘normal’ T-shirt, making it suitable for casual wear and exercise wear. It comes in quite a few colors so there’s probably a color there that you will like. I don’t like many logos on my shirts, and was happy to see that the only logo on these shirts was a discreet yellow ‘Smarter Science’ tag on the sleeve. It is form fitting and a flattering cut without showing off every curve of my muscles (sorry ladies, I’m married). Tight enough to move with me, but not too tight so I felt vacuum-packed.

Fit
I have a lighter frame, so when looking at the sizing chart small was the size that suited me best. It is a very comfortable and a good fit. The shirt initially felt a little tight around the neck, but within an hour and every other time I’ve worn it I haven’t noticed it at all.
Comfort
In my opinion, as nice as the shirt looks and fits, it only lives up to its promises if it stays comfortable in a variety of situations. While sitting down at the computer in a fairly cool house (65F), the fabric of the shirt was very comfortable against the skin and I felt reasonably comfortable sitting down with only the T-shirt on (and pants). After wearing it for a whole day with walking, lifting and sitting all involved, the shirt continued to be comfortable and smelled pretty nice too.


It was then time to try to put the shirt to the best test I could (on a cold and wet wintery day in the North West). I went over to a gym and put myself through the most rigorous 20 minute upper body workout that I could. I quickly worked up a sweat through push-ups, sit-ups weights and jumping jacks in order to see if the shirt lived up to its promise. At the end of this exercise (that would make me very sore the next day) I was pleasantly rewarded. The shirt continued to stay mostly dry, and I found that I was definitely more comfortable when compared to a basic regular T-shirt. What’s more is that once I got home from this workout, my wife thought I smelled pretty nice too.
My first impression of this shirt is very positive. Having put this shirt through a fairly rigorous test both in the daily tasks as well as a hard workout, the Smarter Basics T-shirt maintained a good level of comfort throughout and demonstrates its all-purpose active wear use. As we get into the season of hiking, and once I start wearing only a T-shirt on my bike rides, I will definitely be using this shirt and hope to provide more update of how it wears over time.
Oh… and one last thing. active wear, dri fit shirts, moisture wicking fabric. w00t!
Graeme A.
The Outdoor Adventure Team
Shirt provided by Sport Science

Upcoming Reviews: AMK

Sorry for the delay, but I assure you we have some reviews in the pipe and we wanted to let you know what they were, so here are some photos of what we’re testing. Have you seen or tried any of these? What do you think?

The AMK (Adventure Medical Kits) SOL Origin
The AMK Escape Bivvy
The AMK 0.7 Medical Kit
So, do you use AMK gear? Do you want to win some? If so, check out our Survial Week Giveaway that ends tomorrow!

Buff USA Merino Wool Buff – Gear Review

As seen on Survivor™ on CBS® (…and now also on www.TheOutdoorAdventure.net! )

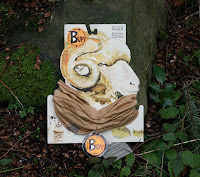
“Seamless, multifunctional headwear was first established with the all-season Original Buff®. It’s the most versatile, simple and effective article of technical clothing you can own. Made from seamless 100% microfiber, not only is Original Buff® durable, it’s breathable, wicks moisture and dries quickly too.” Quoted directly from their official website:  www.buffusa.com

Simply stated, Buff® headwear is a seamless tube of fabric that can be worn in an assortment of ways. Be it biking, hiking, yoga, or chasing a toddler through the park, the Buff® is designed to offer technical performance and protection from the elements no matter what your adventure! Those just happen to be the adventures on which I embarked to test the claims of the merino wool Wool Buff®.

So does the Buff® live up to the hype? Well, here’s my opinion:

First of all, I checked out their handy reference guide on their website on How To Wear A Buff. I found it to be very helpful, especially with the more tricky options! I messed around in front of the mirror for a little while to familiarize myself with the different options, and even put it to the test. Turns out, the “Foulard” is super helpful in keeping long hair out of the way when washing your face. I attempted the “Hair Tie”, but I am not blessed with an abundance of thick luscious hair like the ladies in the shampoo commercials, so it just kept slipping out.


I headed out on a bike ride with my daughter in tow. I rocked the “Helmet Liner”, “Neck Gaitor”, “Face Mask”, “Pirate”, and “Sun Guard” looks. I would like to say I rocked the “Balaclava” look too, but I honestly could not get it to work for me! I attempted the “Hood” as well, but I felt too claustrophobic. My personal favorite way to wear it for biking on a clear, cold, wintery day was definitely the “Face Mask” method. I felt like I could breathe easily, without the uncomfortable lung freeze feeling! I’m such a wimp, I can’t stand that lung freeze feeling. Even when I broke out into a full out sweat, the 100% Merino Wool Buff® didn’t itch or overheat my neck. I’d say their claim of “Natural Microclimate Control” is right on! It stayed put on my face, and didn’t budge — even with my frequent twisting and turning to reassure my impatient toddler that we were only going “a couple more miles.” I think she’s on to me.


We stopped at a park to “get her wiggles out” before the return trip back home. As it turns out, the Buff® can also be a pretty cool cape when tucked in to the back of a toddler’s shirt.


In the evening I wore the Buff® in a modified “Foulard” for my yoga class. I like to wear my hair loose during yoga to avoid any tension of a hair tie, but trying to huff and puff wispy hairs out of my face while in Adho Mukha Svanasana is far from relaxing. I followed the steps to create the “Foulard”, contained all my hair into the tube, and then tucked the back flap underneath the seam at the nape of my neck. Ta Da! No more hair wisps to huff and puff about!


I wore the Buff® in the “Neckerchief” while buying groceries at the local grocery store, and received two compliments on the pattern and style of my “scarf”. So there you go, ladies, with all the many style options available from Buff® you too can be the envy of all those in your local produce isle. The “Neckerchief” is my favorite neutral way to wear the Buff® in this chilly winter weather, because the material is lightweight and breathable I don’t feel the need to take it on and off repeatedly while out running errands. It’s the perfect seam connection between my jacket and the neckline of my shirt. No more frosty breezes sending chills down my spine while loading my enormous haul of grocery bags into the trunk!

On a separate occasion my daughter and I went exploring in a local forest, during which I wore the Buff® in the “Wristband” method. Not gonna lie, the wristband method is super useful for wiping toddler snot when you forget to pack tissues. It’s gross, but it’s legit. In my defense, I had to test out how well the Buff® held up in the laundry anyway! I’m happy to report that my Buff® is snot-free, odor-free, and looking good as new! (Don’t worry, it’s not the same Buff® included in any of our giveaways…)


So, there you have it. Thanks again to Buff® for the opportunity to review the merino wool Wool Buff®!

Have you tried the Buff® before? Any tips on alternate ways of wearing it? We would love to hear from you so comment, tweet, and share on Facebook!


Reviewed By:
Tabea B
The Outdoor Adventure Team

Beyond Coastal Sun Care – Product Review

Always on the look out for a more natural and safer sunscreen for myself and my children, I was thrilled that Beyond Coastal gave me a chance to review some of their products.

I have tried a number of brands in the past but Beyond Coastal is definitely one of the best that I have tried so far.

They gave me Active Sunscreen SPF 30+, Natural Clear SPF 30, Active Face Stick, Natural Lip and Face Screen SPF 30, and a variety of flavors of their new line of flavored lip balm to try. Here are my thoughts:
Active Sunscreen SPF 30+

This sweat and water resistant, non-mineral broad spectrum UVA/UVB protection sunscreen is gluten free (great news for my son) and also free of all those nasty oxybenzone, paraben and petroleum stuff which, though not conclusively proven, has me worried about what chemicals and toxins are entering my body through my skin.


So it doesn’t contain any of those nasty chemicals, so what does it contain? Healing aloe vera, revitalizing green tea, nourishing Vitamins C and E, moisturizing shea butter, soothing yerba mate, hydrating panthenol and algae extract is enough to make any skin happy. The sun protection (active ingredients) come from octinoxate, octisalate (that gives it that lightly sweet scent), octocrylene and avobenzone (which protects against UVA rays). Ocinoxate makes up the majority of the active ingredients at about 7.5% and avobenzone makes up only 2%.


I liked that it has no noticible scent and that it applied invisibly to my skin and after 5 minutes when I checked again, it was almost unnoticeable. No white residue.


As some of the active ingredients (such as Avobenzone) start to degrade within an hour when exposed to UV rays, Beyond Coastal added Solistay to prolong and stabilize its effectiveness. As I burn easily, I will be curious to try it this summer and find out how effective it is at keeping my fair skin from turning an unflattering strawberry color. I like this sunscreen because of how quickly it disappeared on my skin, how a little went a long way, that it had no scent and that it was water resistant. I am not wild about the fact that it still contains octocrylene (4% of the active ingredients) which some studies have linked with increased incidences of malignant melanoma.

Natural Clear Sunscreen SPF 30
If your plan for the day is to cheer on your favorite team, a stroll in the park with your best friend (be it four footed or two) or taking a spin in a convertible then this is the sunscreen of choice. It is a good everyday sunscreen which one can easily apply makeup over it without the makeup caking and no one will know that your skin is protected (even without makeup).

What makes Natural Clear Sunscreen a good every day sunscreen is that it only has one active ingredient (the very safe and non-toxic zinc oxide). It also nourishes your skin with rose hip oil, jojoba seed oil and shea butter.It repairs and hydrates with cococa seed butter, alpha lipoic acid (an anti-oxidant), pro vitamin B, algea extract, and aloe vera.


Fragrance free like the other sunscreens, it has only a very faint sweet smell. The zinc oxide sits on the skin’s surface and is not absorbed into the skin while protecting the skin from both UVA and UVB ultraviolet rays and is not destroyed by the sun like some other sunscreen ingredients.


I like this sunscreen because it absorbs so quickly into the skin and leaves no noticeable residue while still giving my skin powerful protection against the sun. I also love the active ingredient list. Even though the sun protection will rub off with a towel, wash off while swimming, and sweat away when exercising, I think the hassle of frequent application is worth it because of the lower risk of strange (and potentially harmful) things being absorbed into the skin.

Natural Lip and Face Screen


I did not like the Natural lip and Face Screen. Even after 10 minutes there was still a noticeable white sheen on the skin. It has a very light, hardly noticeable scent and comes in a tub which meant that the sunscreen got under my nails.
The active ingredients are in equal amounts Titanium Dioxide (which does get absorbed into the skin) and Zinc Oxide (which stays on the surface of the skin). For moisturizing and hydration of the skin there is aloe vera, coconut oil, safflower oil, Vitamin C and E, Shea butter, beeswax and Mango butter.


Like the other sunscreens by Beyond Coastal it is gluten free, and Paraben and Petroleum free. It offers strong UVB and UVA protection but I still prefer Natural Clear Sunscreen SPF 30+.

Active Face Stick

The Active Sunscreen Face Stick’s biggest advantage is that one can apply it without getting one’s hands greasy. It comes in a stick form (kind of like deodorant) and is great for people who don’t want their hands to be slippery every time they apply sunscreen. One could apply this sunscreen half way up a cliff face and still be fine to keep on going.


It has a pleasant unobtrusive scent. Easy no-mess application, no drip, no sunscreen in the eye, no inhalation (like with spray-ons) and no greasy fingers.


After 10 minutes the face still felt sticky and greasy to the touch (but not more so then most normal sunscreens).


The active ingredients are Avobenzone, homosalate, octinoxate and octocrylene (boo!). It nourishes and hydrates with aloe vera, Vitamin E, Beeswax, shea butter, yerba mate, and orange oil extract (which gives it a light hint of citrus scent).


If I was in any sort of active sport which would make slippery hands dangerous then I would use this product. It is water and sweat resistant and oxybenzone, paraben and petroleum free but it still contains octocrylene which turns me off.

SPF 15 Active Lip Balm


Coming in four fun flavors (Citrus Grove, Mint Leaf, Cherry Blossom, and Vanilla Bean) these Active lip balms nourish and hydrate (beeswax, aloe vera, shea butter and yerba mate) while giving your lips protection (octinoxate, octisalate, octocrylene, avobenzone) against UVB and UVA rays. I normally don’t go for scented lip balms as I find them too cloyingly sweet but that was not the case with this brand. Applied to dry, slightly chapped lips it instantly gave relief and moisturized my lips leaving them feeling luscious. They stayed on even after drinking some tea and giving my husband a kiss (he didn’t mind the scent either). It left my lips feeling smooth and not sticky and kept them soft throughout the day.


by Thamar A.
The Outdoor Adventure Team


Products provided by http://www.beyondcoastal.com/

Polarmax Comp 4 Tech Base Layers – company profile and review

Have you heard of Polarmax? They’re a North Carolina based producer of Performance Base Layer gear.  Working with a variety of different materials and their own technology they’ve produced baselayers that are meant to help suit our various base layer needs. They categorize them as warm, warmer and warmest too so you know what to expect and what will be best for your climate/outdoors activities. That was important for me when I contacted them about some base layer gear for my summit attempts this summer on some 20 000+ foot peaks in Bolivia. I didn’t wan’t to be caught out in the cold… literally so I did my research and this is what I found:

First of all I was impressed with their Made in USA approach. Polarmax manages the whole process of making the base layers; from design to testing to manufacture to sales and marketing to distribution and customer service, they know what’s going on… and more than that, they keep it green. Everything is done within in a 15 mile radius. From fabric production, to manufacture to warehouses, everything is kept close together. This means less impact on the environment and more jobs and business kept within the country. As an addeds bonus, it helps keep costs down for you and me as well.


Polarmax knows that one base layer doesn’t suit all conditions. Because of that, they put their layers in three categories: warm, warmer and warmest. Choose your adventure and choose how warm you need to be. Spring, summer, winter or fall, they’ll take care of you.


Synthetics are good for breathing and moisture wicking, to top that all off they improve it with their 100% Acclimate Dry Performance Fabric. Some people complain that synthetics can get smelly. OK, better said, some people say that they get smelly in synthetics. To help combat the problem of the smelly hiker / climber / snowboarder, etc, They include a scent prevent protection which as anti-microbial and has anti-odor protection.


If you’re into extreme winter sports like mountaineering you should check out their fleece base layers for those really extreme climates. They use a soft microfleece and flat seam stitching (used on all of their gear) and 10% spandex to give you a more comfortable fit that moves with you while you’re staying warm. The last thing you want to worry about is itchiness and uncomfortable seams!


Polarmax sent me a set of COMP 4 TECH fleece base layers (PMX Hoodie and matching tights) for me to test out. I haven’t been able to put them through their paces yet to give an effective review, but i’ll be getting out in them and putting them through their paces soon. Stay tuned for some long term and more detailed reviews, including how well they hold up on my 20000+ foot summit attempts this summer in South America.

Want your own set? watch for this Thursday’s post where we giveaway a set of sweet COMP 4 TECH FLEECE PMX Hoodie and matching COMP-4 base layer bottoms (just like the ones they sent me!).

Gear Review: Golite Cave 2 Shelter

If you’ve been looking to lower your pack weight, you’ve probably heard of Golite. If not, have you seen Andrew Skurka’s new book? That pack on the front is made by them. As their name insinuates, they sell lightweight backpacking gear that helps you go… light. Last year for my birthday my wife agreed to let me buy a second hand shelter setup, a Golite Cave 2 silnylon tarp and a Golite Lair Nest mesh-tent.


As a family man now, I was looking for something we could take out and use that didn’t weigh a lot. For a small group, this is it. Using the mesh tent, I can get 3 adults at a tight squeeze. With just the tarp, I’ve fit two adults and our three kids with space to spare. And weight?  The tarp weighs in at 19.5 ounces and the mesh tent at just under 26 ounces. That’s under 3 lbs for the set. To help keep the weight down it relies on trekking poles or sticks found in the area to set it up.

Golite Cave 2 Specs
  •  SilLite™ silicone-impregnated ripstop nylon: ultra-lite, ultra-tough, ultra-waterproof
  •  2 beaks
  •  Lots of tie-out points
  • Compatible with both Lair Nest and Lair Nest 2
  •  3-season, 3-person
  • Area: 89 sq ft / 8.3m2
  • 19.5 ounces

<A HREF=”http://ws.amazon.com/widgets/q?rt=tf_cw&ServiceVersion=20070822&MarketPlace=US&ID=V20070822%2FUS%2Fsurvi0d-20%2F8010%2F191411f7-5575-4c1c-a005-b2ff14c3fff2&Operation=NoScript”>Amazon.com Widgets</A>

My Thoughts – the Good
  • It’s a really light and super compressible.
  • It takes up almost no space in my pack.
  • It can be set up in a whole bunch of ways to suit the weather and group size.
  • The tie-out points on the sides really allow for a nice cave-like setup that gives a lot of space to move, even while pitched right to the ground.
  • Being able to pitch flat to the ground is a huge bonus
Pitched with poles underneath on a trip this summer. We had 3 guys inside with the nest.
My thoughts – the not so good
  • Trying to pitch it by one’s self is a real pain.
    • I found it easiest to peg out the sides first and then set up the poles for the ridge.
  • The tie-out points are small and weak. Mine was used and the corner points are worn half through.
  • The beaks can only be pitched tight at one angle, otherwise they flap. Not a big deal, but when it is advertised as having any type of setup that you want, it makes it a draw back.
  • It says it is compatible with the Lair 2 Nest, but I find the Lair 2 Nest is a bit too wide at one end to use when pegging the tarp near the ground.
  • Too many tie out points!
Again, pitched with poles inside on a trip last summer with my daughter.
As you can see, here it was pitched right to the ground because of wind and cold.
Overall Thoughts


I honestly really like this shelter a lot. It is my first tarp setup and I find the flexibility of using it solo or with the Nest great. The two take up very little space and using the trekking poles is a great way to save weight that otherwise would have been wasted on tent poles. It’s frustrating to have to carry so many tie out points, but I’m probably going to go Titanium in the next little while and cut down some weight there.

I’ve taken it out a few times and as a 3 – season shelter for 2+ people it’s great. I definitely recommend the nest if you’re going to be hiking where there are mosquitos.


All in all I’d give a strong recommendation to Golite shelters, especially this setup.

<A HREF=”http://ws.amazon.com/widgets/q?rt=tf_cw&ServiceVersion=20070822&MarketPlace=US&ID=V20070822%2FUS%2Fsurvi0d-20%2F8010%2F191411f7-5575-4c1c-a005-b2ff14c3fff2&Operation=NoScript”>Amazon.com Widgets</A>

Gear Review: Jetboil Zip

I have long rejected the thought of cooking ‘systems’ in preference for the flexibility afforded when I can pick the pot and stove best suited for my trip. The Jetboil Zip, and by extension the whole Jetboil cooking system has challenged that preference with an efficient and well-designed system demonstrated in the Jetboil Zip.


The Jetboil Zip is generally designed around the thought that in the backcountry you will mostly be eating freeze dried food, and so its principle use is that of boiling water.
 
Fully-loaded (Fuel and all accessories), the Jetboil Zip weighs in at 560 grams, or 20 oz. Without fuel you start with 370 grams / 13oz.  The cup has a capacity of 800ml (27 fl oz) and the system maintains compatibility with all of other systems in the Jetboil family. The inside of the cup has measuring lines up to 500ml, perfect for most freeze dried meals. This makes the Jetboil Zip system perfect for a single individual as you are easily able to boil water for your food and a bit extra for that cup of tea you may need.
 
One of the particularly nice features of the Jetboil Zip system is its efficient use of space in your pack. Within the 800ml space you are able to fit the stabilizer tripod, stove, fuel (100 gram Jetboil fuel), and a pot stand. The lid features a spout for sipping/pouring as well as a strainer. The bottom of the cup has the standard Jetboil Flux Ring (a build in heat exchanger / windscreen) and a protective cap that doubles as a measuring cup. If that seems like a lot to fit together the insulating cozy has a diagram indicating the order everything fits. For a tiny weight savings, if you are not bringing another pot you can leave the pot stand at home.


Putting the Jetboil together is relatively easy. The pieces are all straightforward to assemble and you can tell quickly what goes where. Using the stabilizer tripod is a little cumbersome, though probably useful of you are on uneven ground. As well, getting the cup on to the stove itself can be a challenge when having to line up the slots. Granted this was my first time using it. I’m sure with time there is a certain intuition that helps get everything lined up properly.
 
The stove is well built and of solid construction. The Jetboil Zip stove requires you bring a lighter or matches (which are probably good to pack anyway) and has very good heat output. It has a ring that fits around the bottom of the companion cup and is designed to minimize exposure to wind, relying on the flux ring and metal supports to either deflect or slow with wind enough that it maximizes heat being applied to the cup. It is not the best windscreen, but it is far better than cooking without a wind screen at all. The control knob allows decent flame control, though its small size would make it difficult to use with gloves.
 
The Jetboil Zip has an advertised boil time of 500ml in just over 2 minutes, 30 seconds. However, living in the Pacific Northwest means that there is a vast variety of conditions that may be encountered.  I took the Jetboil to the park where the temperature was about 7 Celsius/45 Fahrenheit with the goal of boiling 500ml of ice cold water. In only very mildly breeze conditions and on slightly uneven ground the Jetboil Zip took the water from very cold to a rolling boil in 3 minutes 25 seconds. It feels like hardly a wait if you start another activity while you’re water is boiling.
 
At the end of the day I found the Jetboil Zip to be a decently made and highly efficient product that has convinced me of the usefulness and efficiently of the Jetboil system in the backcountry. Boiling water is probably the most common activity and this stove does a great job of it. The 800ml capacity is perfect as it fits everything one person needs in a nice compact space. I found that the control knob, stabilizer tripod, and the task of getting the cup on to the stove are a bit finicky, but with a bit of practice I would expect it would get better. For a simple, no frills, and yet highly efficient stove, you cannot go wrong with the Jetboil Zip. However, if you are looking for a few more features, I would strongly consider the Jetboil Sol system as it is a similar size but with easier flame control, piezo ignition, and a little less weight.
 
Summary:
 
Pros:
         Reasonably light – weight
         Compact stove
         Very efficient at boiling water
Cons:
          Flame control knob is small
          Cup and stabilizer tripod are finicky
 
The final verdict:
A well-built, compact and efficient stove that performs well for a single person, but lacks a number of features possessed by other members of the Jetboil family.

Prepared by Graeme A.

This Jetboil Zip was borrowed from Chris Pund at http://www.thegearhouse.com. As always, opinions are those of the writer and are the same recommendations we’d give close friends.