Home / gear (page 16)

gear

Guest Post: Getting the most out of a handheld GPS by Kevin Jordan

As an avid hiker, climber, and backpacker, I have quite a collection of outdoor gear. My closet is filled with ropes, backpacks, cookware, hiking poles…basically everything one would need for an outdoor adventure. Some things I don’t get much use out of–for example, I’ve got an ice ax in there somewhere that hasn’t seen action in three years. However, there are other things that I find so useful that I never enter the woods without them. One such tool is the subject of today’s article–my handheld GPS receiver.

As the owner of a GPS rental service, I have lots of experience helping people learn how to use handheld GPS units for outdoor activities. I have found that most people aren’t aware of just how useful a handheld GPS unit can be. Even people who have owned one for years often are not getting full use of the unit’s capabilities. In today’s post, I’ll cover the best ways to use a handheld GPS unit for a typical hiking or backpacking trip, from the planning stages to the post-trip sharing of your experience.

Planning the trip

The trip planning stage is very important when using a handheld GPS unit, and it’s often one that many people skip–which is why they’re not getting full use out of their GPS. It’s during the planning stage that you’ll load any maps, waypoints, routes, or tracks on your GPS unit that you think might be helpful. For example, for a typical short backpacking trip, you’d want to create waypoints at the start and end of the hike, your planned camping spots, water sources, trail intersections, etc. Most GPS manufacturers provide free computer software that you can download to assist in this process, so that you can do all the planning on the computer and then simply transfer the information to the GPS.

There are many excellent websites, such as Backpacker.com and Trailheadfinder.com, where you can download routes, tracks, and waypoints for many trips that other people have already posted. Many free GPS maps are also available at sites like the GPS File Depot.


Taking the trip

At the trailhead, activate the route you’ve loaded on the GPS, or select the first waypoint you’ll be navigating to. As you hike, keep the GPS clipped to a belt or shoulder strap on your pack so you have access to all the information it will give you. Using the GPS, you’ll be able to see how far you have to go until your next waypoint, and how long it will take you to get there at your current rate of travel. You’ll also be able to see how many miles you’ve covered, what your average speed is, your time moving vs time stopped (i.e, rest breaks), altitude gained and lost, and much more.
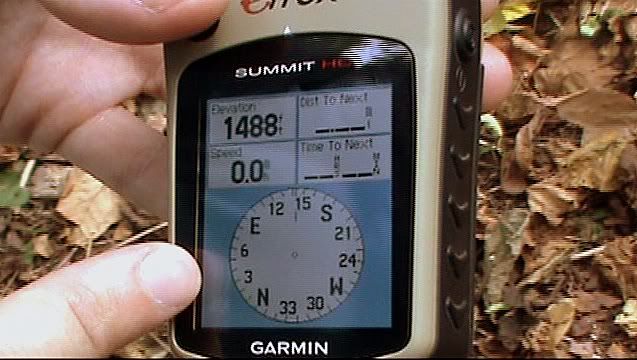
  GPS

By looking at the map page, you’ll be able to see at a glance where you’re at, what terrain features are nearby, and what’s coming up around the next turn or over the next hill. It greatly increases your situational awareness, and gives you the information you need to make decisions. For example, let’s say you’re trying to reach your next campsite by a certain time. Your GPS will give you a constantly updated ETA, so you’ll know if you have time to stop and enjoy the scenery, or if you need to increase your speed to make it on time.

 GPS map

After the trip

At the end of your hike, you can save your track on the GPS unit, so that you can share it with your friends or post it on-line for the benefit of other hikers. Also, if you’ve taken pictures on the trip at locations where you created waypoints, you can geo-tag those pictures so others can see exactly where they were taken (GPS units with built-in cameras automatically do this for you). Finally, you can review your stats for the trip to see if you really traveled as far, climbed as high, and moved as fast as you thought you did

Now, a handheld GPS unit is not a substitute for a paper map and compass. You should always carry those with you, and know how to use them. However, when used correctly, a good GPS unit will give you the confidence you need to take your outdoor adventures to the next level.

Vasque Voltas for kids – Why you should invest in good shoes… for them!


Parents you know the deal. The kids go through new shoes faster than going through toilet paper. Or at least that’s how it seems. And now that you’re thinking about potty training let’s come back to the topic of shoes. Yup, if they haven’t worn holes in them then they’ve probably already grown out of them. And, as much as you don’t want to fork out for “expensive” shoes you need to think about your kids’ feet, especially if they’re the outdoors type. Enter Vasque.

I just want to say, this isn’t sponsored, Vasque isn’t paying me. I’m just really impressed with the shoes.


Why to buy Good Shoes

Ok, so first off, bad shoes can lead to big problems for your child’s feet. Lack of support, lack of flexibility and lack of breathability can lead to discomfort, fallen arches and problems with mobility and foot development in general. If you don’t believe me, trust the experts. Plus, cheap shoes tend to fall apart more quickly.

If you wouldn’t want to go out running or hiking long distances in a $10 pair of runners I can guarantee that your kids won’t either. Kids play. They tend to walk/run/climb a lot more than we do and that’s going to mean more of a need for a decent pair of shoes than most of us desk workers.


On a whim, I went into a certain cheap big box store and looked for shoes for my daughter, just to get an idea of what they offered. I first noticed that the shoes weren’t cheap. $30 for a pair of low quality sandals! I then noticed the cheap materials, lack of arch support, etc. I wasn’t going to pay $30 for junk. So I left.


Buying Online

Then, I did something I recommend you do. I shopped online. Yah I know we all know about shopping online, but I recommend you check reviews of quality shoe brands and then go to somewhere online like the Sierra Trading Post to make your purchase. Sierra Trading post doesn’t always stock the same brands or models, but I picked up a pair of Vasque Volta shoes for my daughter there for $15. Yes, that’s right $15… OK so it was $20 with shipping. They may have been last season’s model, but that didn’t matter to her. They’re her everything runners and even I doubt she’ll wear them out before outgrowing them. That means my son will get them next (It’s just good they weren’t pink).


Vasque Volta


The Vasque Volta is a really nice hiking shoe for kids. It looks and acts just like an adult’s hiking shoe. 


When I opened the box, the first thing I noticed was the flexible sole. It was really nice and pliable. My sister-in-law always says that you need that on kids’ shoes. Studies show that the flexible sole helps the development of normal mobility and strength.  

The second thing I noticed was the traction. It’s serious stuff! I took her hiking on a trail with normal shoes and she was slipping all the time, but after getting her these she rarely takes a slide at all! She hikes more confidently and that means we can do more together outdoors.


The second think I noticed was the support and foam padding, i.e. quality materials. I’ve purchased cheap shoes for myself and I know that the first thing that goes is the cheap foam behind the heel, then the arch support. Well, not only can you notice on the Vasque runners just by look and feel that it’s a much better quality I can see it in my daughter’s activities and foot health. She hasn’t had a single sore on her foot from these shoes, even if she gets them wet! There was no break in time needed with these and she hikes without a single complaint about her feet.


Another feature I like is the draw string laces. She has no problem taking them off or putting them on by herself. It was a toss-up going for laces or draw strings, but these haven’t slipped any more than my son’s laces, even on hard hiking trails. When you have 3 kids, the sooner the kids can put on their own shoes, the better!


The upper shoe is made of leather and fabric, allowing good support and breathability. It does make them a bit more susceptible to getting wet, but that hasn’t caused a problem for us.


Honestly, I can’t think of anything bad to say about these shoes. Even the color combo is great for her (Canteen/Nile). I will definitely be looking for more of these in the future!


Shopping Online

I can strongly recommend these shoes for an outdoors kid and would strongly recommend checking out the Sierra Trading Post online or in your local area to see what they have to offer.


If you haven’t purchased anything from the Sierra Trading Post, drop me an email paul.osborn(at)theoutdooradventure.net and I’ll invite you for a $10 discount. Oh and this is where this could help me out. If you make a purchase then they will offer me the same deal on my next purchase!

The Doite Adventure Stool (Piso Adventure)

Looking for something to sit on on your backpacking trips, but short on space? I was. A Chilean company called Doite, which makes a wide variety of backpacking and outdoors gear has come out with their adventure chair, a highly portable seat that comes in its own case. It’s called the “Piso Adventure” or Adventure Stool.


Here’s a short list of features and details:
  • ·       Set-up stool size: 29 x 15 x 29cm
  • ·         packed stool size: 22.5 x 18* cm x 3cm (*18cm at the widest point 10.5 cm at thinnest)
  • ·         Weight with case: 25.3 oz / 1.586 lbs / 0.72 Kg
  • ·         Weight without case 23.15 oz / 1.448 lbs / .66 Kg
  • ·         Good for up to 80 kilos (176 lbs)


Obviously this thing would be considered to be more of a luxury item, but for anyone that wants to be a bit more comfortable and off the ground on your day/weekend trips you might want to consider this cool little product.
What I like about it
 
Size and weight
I love how small this thing is. I started backpacking with my daughter (5) recently and I wanted to take some chairs with us (we were planning on doing some fishing, plus there wasn’t a lot of deadfalls around). I ended up strapping them to the outside of an already heavy pack and it wasn’t any fun. On the other hand, I took two of these Doite chairs on a day hike with my son (3) and daughter (5) and it took me a bit of time to find them in the pack they were so small.
Realizing that any stool/chair is a luxury and adds weight, these don’t do too badly at 1.5 lbs. Especially when they are advertised as weighing 1.9 lbs (0.9 kg).
Comfort and sturdiness
Doite got the collapsible frame done right. Despite being so compact (enough to fit in a backpack pocket) it is sturdy and durable. The frame is reinforced by a strap on each side and a metal hook lock on the bottom (with 4 different settings). Although the stool is rated for 176 lbs, I come in right around that range and feels like it could handle another 20 lbs without any trouble.
Complaints
 
It’s a bit short. I foot tall is a bit small for me. It does fine and it’s comfortable but they could have added another few inches (without affecting the size too much.)
The packing case is made of the same material as the seat and is in my opinion unnecessarily heavy. The medium duty zipper on the case doesn’t extend to the ends of the side of the case and that makes it a bit of work to get it out.
All in all though, I’m happy with the chair despite a couple of improvements:
I would probably replace the bottom metal lock system with some strapping to save a bit more weight. It uses steel for the frame which is heavy, but I don’t know if you could save any weight on them without compromising integrity.
The final downer is that you’ll have to ask a friend to pick one up for you next time they’re in South America. I haven’t found them available in North America.
Final Thoughts
If you’re someone who wants a little bit of luxury, but can’t afford a lot of pack space, consider this “Piso Adventure” (Spanish for adventure stool). Impress your friends at the fireside and keep yourself higher and dryer.
Take a look at the website for this and other DOITE gear.
Doite Piso Adventure
Doite English site

DIY: How to make an emergency blanket sleep system (Quilt)

For the next little while I’m down in South America and I didn’t bring a sleeping bag. I don’t want to buy a new one down here if I don’t have to, so in typical DIY fashion I decided to work with what I have: A closed cell foam sleeping pad and an emergency blanket.

The biggest thing I was worried about was the fact that mylar blankets, being so light, tend to let the warm air out the gaps. Yes they insulate to 90%, but that’s if the are tucked in nice and snugly. I decided to take a hint from ultralight backpacking. To shave off a few more ounces, several companies make sleeping bags that are open on the back (because any part of the bag that you lie on doesn’t insulate very well anyway). They use the sleeping pad inside the quilt by using strings or thin fabric on the back of the “ultralight quilt” and voila! I decided to put that to work.

I tried it out at 10 500 feet where the temperature got down to 3 degrees C (40 degrees F). That was to cold, but down to 50 degrees F(10 C) it was quite comfy. 7 degrees Celsius is probably the limit. All told it weighed 2 oz for the blanket system and 7 oz for the mat.

Here’s the materials list:

  • One closed cell foam sleeping pad
  • 1 roll of tuck or packing tape
  • 10 feet of string cut into 18 inch lengths
  • 1 emergency blanket
I decided to do it in video form to make it more entertaining.
Take a look at the video below to see the “making of” the emergency quilt sleep system.

Gear Review: Gerber Paraframe Mini Knife

Every… ok, most knives have their time and place. There are crowds that prefer fixed blades and those that swear by folding knives. I have had my share of knives… I still do in fact. I still play around with making my own fixed bladed knives. But, as a father who just started backpacking with his 5 year old I realize that every ounce is important and that wherever I can cut down on weight and/or space I should. So out comes the gerber mini paraframe.

This little $10 fella has really impressed me. I’ve had it for years now and even though… or maybe because this thing is so small and light I take it everywhere with me. I’m strongly considering taking it as my ONLY knife for backpacking. Let’s talk specs.

This thing is only 3 inches long when closed and weighs in at a mere 1.4 ounces. Even then it has over a 2 inch blade (2 1/4).  It’s made of high carbon stainless steel and takes and holds an edge really well.

As far as features, it’s pretty simple. It uses the paraframe, kind of like a skeleton to cut down on the weight, but maintain its strength. It’s held open by a framelock that takes a bit to get used to if you haven’t encountered it before. I have had more than one person struggle to figure out how to close it. The lock works really well. It’s nigh on impossible to close it accidentally (I’m sure someone will find a way to do it, but I haven’t had any success) and when open, the knife holds together very solidly.There’s no flop or looseness like other cheap knives. In addition to all that the pocket clip is super sturdy. I don’t see that thing coming off ever.

Gerber has done a great job with this thing. I can’t think of a way to improve it. It comes in a fine edge and serrated edge and for the money is one of the best knives I’ve used.

DIY: Put a filter on your hydration pack

Ask what you should do on a backpacking forum for potable drinking water and you’ll come up with a lot of answers. Some swear by chemical tablets, others are devoted to filters and or simple boiling. Most people are aware of the dangers of giardia and cryptosporidium and so it isn’t a question of whether or not, but rather of how to purify your water. I’m never one to want to dilly dally and not one to do a lot of work, so I came up with this DIY project to incorporate a backflushable 0.1 micron filter into my hydration bladder. With my bladder (Outdoor products) the filter from my sawyer water filter attaches perfectly to my hydration hose.

Here’s what you’ll need:

Warning: This probably voids the warranty on your hydration pack so DIY at YOR (your own risk)
Steps:
  1. Determine where to cut. Based on your hydration pack and use, you will have to choose your ideal place for the filter. Things to keep in mind are:
    1. Whether it will fit into your hydration pack with the filter connected or not.
    2. Whether you will want to have it insulated (if you put the filter close to the bite valve you’re more likely to have a frozen filter in cold weather).
  2. Cut the hydration hose leaving at least 4 inches of tube from the end connectors of the hose. This will make it easier for future adjustments and repairs.
  3. Determine the flow direction of the filter. There is usually a flow indicator on the filter. Make sure to get it right. If there is no indicator, choose a direction, mark it permanently on your filter and use it only in that direction.
  4. Connect the filter to the hydration tube. If it is too loose and allows air in or water out, you can try hose clamps (available in most hardware stores).
That’s it. I’ve used this method on several hikes and it’s great. Just scoop water out of a stream or lake and start drinking. Even better, you can disconnect your bite valve and hang your hydration bladder in a tree and drip filter for other people as well! If I don’t want to bring water to a full boil i’ll just fill a pot from my bladder and go from there!

I bought a sawyer water bottle with inline filter from Walmart that I pulled the filter out of for this project. If you’re looking to try this but still have a useable filter system that works, here’s the walmart link.

Review: De-Fishing Soap

I’ve done a lot of fishing in my time. Some days are good and some are bad. Now a days I use barbless hooks for one reason only: I don’t like getting fish smell on me. I find that I can usually unhook the fish and get it off without transferring the almost permanent smell onto my hands. It works until it swallows the hook or until I catch something that I want to eat. After that it’s all hands on and I suffer with the consequences of trout stink that no amount of washing gets off. Or at least didn’t. 

Enter De-fishing soap. I saw it on Jason Klass’ blog and had to give it a try. Michelle Innis was kind enough to send me some samples, which packed in for my backpacking trips this summer. So, what’s my take?
Overall I was very impressed, and while not perfect (but honestly what would be apart from a scent free fish?), De-fishing soap will be a companion on all backpacking trips for a few reasons: 
1. It’s the best soap I’ve found yet that removes fish smell. I’ve tried many a different soap and in the end the trout smell is still there strong. All the ones I’ve tried don’t seem to cut through whatever causes that smell and I’ve gone to bed camping many a times with my hands well away from my nose. After two careful washings the smell is almost completely gone. With the combined star anis scent you’re left with a pleasant smell that isn’t overpowering.
I won’t lie, it isn’t perfect. I did for a short time after have a faint fish smell that would probably have completely disappeared with a third or more thorough second washing, but nowhere near as bad as with other soaps. They recommend using a scrubber and warm water (which I didn’t follow either time).
2. It is biodegradable. The low impact of the soap makes it a lot more appealing to environmentally conscious hikers/fisherman. It’s also made in the USA which means the impact is even less!
3. It’s a fish attractant in itself… Huh? I should have read their website before going fishing. As said previously it uses star anis which in itself is a fish attractant. In addition to masking human scent it actually could attract fish to your hook simply because of the odor it leaves on your hands! On their website they suggest using it before fishing just to help us poor, unsuccessful anglers!
These are just a few of the reasons to use De-fishing soap. It really does get rid of fish smells from your hands and does it much more easily in my experience than other soaps. Take a look at their website to see more benefits and where you can get a hold of this neat little product.
Have you used it before? What are your thoughts?
P.S. I have not received nor do receive any money from this review. If you want to try it for yourself, Look at their website for distributors near you.

Gear Review: Altus Light Ascent Trekking poles

You know the old saying, “don’t teach your grandmother to suck eggs”? Well it applies to trekking poles. My dad used to use old ski poles on hiking trips, he has for a long time. We sometimes thought he looked silly. Just like those bell bottomed pants of his that we laughed at, he was right AND they came back into fashion.

Trekking poles have slowly moved from elitists to common place (a sure sign of this is that they are sold at Walmart). Thanks to studies about their benefits and the popularity of Nordic Walking, this once niche item is become mainstream and the focus now is making them compact (for when you don’t need them) and light (to make carrying them more enjoyable and less work).

Two reasons they have become popular are their ability to add stability when dealing with rough terrain and the fact that you can use your upper body to carry some of the weight and thereby increase your endurance. Having an extra point of contact on the ground has saved me from many a fall in the past including a fairly rough drop off that I braved because I had my poles. I also find myself going faster and farther because I push off with each step. Yes it burns more calories, but I can stand to loose a bit of shape.

While you can spend upwards of $200 for carbon fiber trekking poles that way only 4 oz., most of us are going to choose the light but less expensive aluminum poles as they fit our budget ($20+). There are great options out there that you can pick up without forking out too much, which I recommend so you can decide if hiking poles are for you.

When travelling in South America I picked up some Altus Light Ascent trekking poles for under $50. Altus is a spanish company that produces a wide variety of trekking gear for the european market. If you’ve followed this blog you’ll see me use them in a few videos. Some of the features that stick out to me are as follows:

  • Contoured cork handles – Much comfier than hard or even soft plastic, it’s a feature that you tend to find only on the more expensive poles.
  • Angled foot – The foot has tread and is thin and long, as well as on a 45 degree angle. I’ve found it really useful for hills as they grab a lot better and hold traction.
  • Weight – At 8.5 oz each, they’re incredibly light for the price.
After some hard use of them I stripped the plastic locking nut on them. I decided to try out my spanish and put myself in touch with international support. It took a bit of time for them to get back to me (the international sales manager was on the road), but when they did, they bent over backwards to help. They sent me free replacement parts (even though I’m way out of their sales area) in no time. One thing that is very important to me is customer support. After a slow start they really showed how far they are prepared to go to for their name (if I had been in Europe they would have had the pole replaced for free).
I’m happy with my Light Ascents and would definitely recommend them to anyone. If you’re in North America, check out a forum, get some advice and maybe borrow a pair from a friend. You may just find yourself a bit bolder and sure footed on the trail. My daughter is a bit nervous on trails, but with a pole in each hand, she leads the way without any help needed.
check out this guide for the “how to” of trekking poles.

Update:
Things have gone down hill with my poles. I took it out of the car to hike into a lake and one of the pieces had fallen apart and the pieces were jammed inside. The pieces that Altus sent me were for a different trekking pole and they haven’t gotten back to me about it.

Day hike in the hills of La Paz, Bolivia – Part 2

A little while ago I set off into the hills behind San Miguel (in La Paz, Bolivia) for a couple hours of hiking. I ended up going farther than I thought (about 7 km) and saw more sights than I was planning to. I went  up to la muela del diablo, or the devil’s molar and then down.

Here’s a list of the gear that I brought followed by a video of part 2:
Gear:
Altus Light Ascent Trekking Poles
Tilley hat
Icebreaker Bodyfit 150 Baselayer
Tatoo pants
Outdoor Products hydration system (2 liter)

Day hike in the hills of La Paz, Bolivia – Part 1

A little while ago I set off into the hills behind San Miguel (in La Paz, Bolivia) for a couple hours of hiking. The hills around La Paz, Bolivia (10500 feet – 12500 feet) are very water worn like areas of the USA which makes for amazing scenery and steep and sometimes difficult hiking. After climbing up and onto the ridge I hiked along the ridge until I arrived at a famous landmark “La Muela del diablo” (or the Devil’s molar). After that I headed down and back through town. All told it was about 7 KM of hiking and done in under 3 hours.
Here’s a list of the gear that I brought followed by a video of part 1:
Gear:
Altus Light Ascent Trekking Poles
Tilley hat
Icebreaker Bodyfit 150 Baselayer
Tatoo pants
Outdoor Products hydration system (2 liter)

My Icebreaker bodyfit 150 Base Layer

Icebreaker heading up into the Cordillera Real, Bolivia 

If you travelled back thousands of years you’d find people wearing wool. Big and bulky, but warm. It is still warm thousands of years later, but bulk and weight are a thing of the past. Icebreaker has taken some of the best quality wool out there (merino) and removed the itchiness, bulk and weight and left us with some of the best trail clothes around. The most essential of which (in my opinion) is the base layer.

The base layer is what keeps your core temperature. It is foundation of the layering system. Take off some layers, put on others but the base layer remains. I can’t think of a better base layer than the merino wool 150 bodyfit by Icebreaker and here’s why:

The anti-odor properties of Merino wool. I’ve worn this thing 24 hours a day for 3 days and I didn’t turn ripe with BO. I even got a hug from my ever-so-cautious wife!

Anyone familiar with TV Survivorman Les Stroud will know his saying, “You sweat, you die”.  If you do sweat, the bodyfit 150 dries very quickly as the wool pulls the moisture away from the body. If its raining wool has the added benefit of maintaining 80% of its insulating properties while wet.
As mentioned earlier, wool is often thought of as being bulky, heavy and uncomfortable. That’s not the case with Icebreaker. It honestly doesn’t look, smell or feel like great uncle chuck’s knitted cardigan. The Bodyfit 150 rings in at a silky smooth 6.75 oz for a men’s medium, is soft and comfortable against the skin and hugs you like a glove.
If you haven’t tried merino wool or Icebreaker, It is definitely something you should consider adding to your gear list, whether it be the bodyfit base layer line or an insulating layer
What’s your favourite piece of Merino gear and what is your reason for wearing it?

If you are interested in another more thorough review of the Icebreaker merino wool Bodyfit 150 Baselayer, take a look at this article at the Seattle Backpacker Magazine.

10 pieces of not-so-essential gear you probably have forgotten at least once

Are you tired of the 10 essential things to take backpacking? Yes we know we need a shelter, a sleeping bag, stove, etc., but we’ve all started a hike or almost left home without a less glorious item that wasn’t THAT important until you got to camp and realized that you forgot it.

For all of those toilet paperless hikers and annoyed hikers who though their friend brought the lighter, this list is for you:

Camping equipment and gear from EMS.com

What piece of gear have you embarrassingly, regretfully or just plain funnily forgotten on a backwoods adventure?

As many have read, I have a standing request for ideas, gear and articles for the blog. This was brought to my attention by Stephania Andrade of Flank Marketing (they produced this infographic for Eastern Mountain Sports).