Home / gear (page 14)

gear

Sport Science T-shirt – Gear Review

When doing any sort of exertion, wearing a normal t-shirt can leave us first feeling hot and sticky with sweat, and then, once our bodies have cooled off, feeling cold and clammy, with the sweat making the shirt stick to our skin. Adding to the discomfort is the concern for anyone’s nostrils that may be standing downwind.
Optimally, we’d like our shirts to stay dry while moving that heat and moisture from our sweat away from our bodies so we can stay cool while exerting ourselves and comfortable while standing still.
In an effort to create this perfect shirt, Sport Science steps in with their Smarter Basics line of T-shirts. The Smarter Basics t-shirt use an engineered 85% Polyester / 15% cotton moisture wicking fabric that promises to deliver the comfort of a cotton shirt with the quick-drying features of artificial fabrics. In addition, the shirt is treated a “Freshguard” in order to keep the shirt smelling fresher for longer.
We were able to spend some time testing a smarter basics T-shirt. Here’s what we found:

Look

The Smarter Basics T-shirt has a very straightforward and simplistic look to it. Compared with other dri-fit shirts, this one really does look like a ‘normal’ T-shirt, making it suitable for casual wear and exercise wear. It comes in quite a few colors so there’s probably a color there that you will like. I don’t like many logos on my shirts, and was happy to see that the only logo on these shirts was a discreet yellow ‘Smarter Science’ tag on the sleeve. It is form fitting and a flattering cut without showing off every curve of my muscles (sorry ladies, I’m married). Tight enough to move with me, but not too tight so I felt vacuum-packed.

Fit
I have a lighter frame, so when looking at the sizing chart small was the size that suited me best. It is a very comfortable and a good fit. The shirt initially felt a little tight around the neck, but within an hour and every other time I’ve worn it I haven’t noticed it at all.
Comfort
In my opinion, as nice as the shirt looks and fits, it only lives up to its promises if it stays comfortable in a variety of situations. While sitting down at the computer in a fairly cool house (65F), the fabric of the shirt was very comfortable against the skin and I felt reasonably comfortable sitting down with only the T-shirt on (and pants). After wearing it for a whole day with walking, lifting and sitting all involved, the shirt continued to be comfortable and smelled pretty nice too.


It was then time to try to put the shirt to the best test I could (on a cold and wet wintery day in the North West). I went over to a gym and put myself through the most rigorous 20 minute upper body workout that I could. I quickly worked up a sweat through push-ups, sit-ups weights and jumping jacks in order to see if the shirt lived up to its promise. At the end of this exercise (that would make me very sore the next day) I was pleasantly rewarded. The shirt continued to stay mostly dry, and I found that I was definitely more comfortable when compared to a basic regular T-shirt. What’s more is that once I got home from this workout, my wife thought I smelled pretty nice too.
My first impression of this shirt is very positive. Having put this shirt through a fairly rigorous test both in the daily tasks as well as a hard workout, the Smarter Basics T-shirt maintained a good level of comfort throughout and demonstrates its all-purpose active wear use. As we get into the season of hiking, and once I start wearing only a T-shirt on my bike rides, I will definitely be using this shirt and hope to provide more update of how it wears over time.
Oh… and one last thing. active wear, dri fit shirts, moisture wicking fabric. w00t!
Graeme A.
The Outdoor Adventure Team
Shirt provided by Sport Science

Sea to Summit Week Gear Giveaway! – Spring into Adventure!


Wow! Last week’s giveaway was full of awesome gear, but we didn’t think that was enough. It’s time for MORE awesome gear! Time to enter to win awesome backpacking gear from Sea to Summit (including their new 2012 line that just rocks!), plus a merino wool buff, Alpine Aire Foods dehydrated meals, and Beyond Coastal products! 

Keep an eye out for reviews of all this awesome gear and enter below:

If you don’t know what’s happening, for the last couple months, We at The Outdoor Adventure along with in no particular order: My Life Outdoors, Wilderness Dave, A Little CampyHiking the Trail and Trail Sherpa have been working together with a whole bunch of outdoors companies to bring all you guys more than a month of giveaways Here’s what’s up for this week’s giveaway!


Grand Prize:
Sea To Summit Ultra-Mesh Stuff Sack
Sea To Summit Ultra-Sil View Dry Sack
Sea To Summit Ultra-Sil Sink
Sea To Summit Ultra-Sil Bucket
Beyond Coastal Travel Kit
Buff USA Merino Wool Buff
Alpine Aire Food Kit
Second Place Prize:
Sea To Summit Ultra Nano Dry Sack
Enter here:
a Rafflecopter giveaway<a href=”http://rafl.es/enable-js”>You need javascript enabled to see this giveaway</a>.

Upcoming Reviews: AMK

Sorry for the delay, but I assure you we have some reviews in the pipe and we wanted to let you know what they were, so here are some photos of what we’re testing. Have you seen or tried any of these? What do you think?

The AMK (Adventure Medical Kits) SOL Origin
The AMK Escape Bivvy
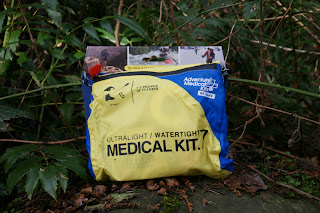
The AMK 0.7 Medical Kit
So, do you use AMK gear? Do you want to win some? If so, check out our Survial Week Giveaway that ends tomorrow!

Survival Week Giveaway! Spring Into Adventure

WAHOO! I’m seriously a bit giddy about this week’s giveaway! Can you believe it? A huge pile of survival gear in all the truest senses of the word! Are you ready?

For the last couple months, We at The Outdoor Adventure along with in no particular order: My Life Outdoors, Wilderness Dave, A Little CampyHiking the Trail and Trail Sherpa have been working together with a whole bunch of outdoors companies to bring all you guys more than a month of giveaways.

This week we’re super excited to be giving away awesome gear to keep you surviving… in style. I recommed you subscribe to the feed for some awesome gear reviews coming up highlighting this stuff on the blog! Oh and we’ll be updating this with links to all the reviews!


Now you want to know what we’re giving away! Wait no further… I mean Look no longer… never mind, just read it and enter to win:

Grand Prize:
Adventure Medical Kits Ultralight Watertight 0.7 oz Med Kit – Review Coming!
Adventure Medical Kits Origin Survival Kit – Review Coming!
Adventure Medical Kits Escape Bivy – Review Coming!
Gerber BG Survival Parang – Review Coming!
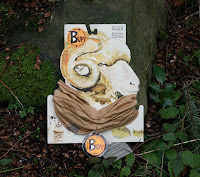
Buff USA Merino Wool Buff, Buff USA Wool Buff Review
Innate Storage Sack
Second Place Prize:
Survival Strap – Review Coming!

Oh sorry about the logo, no alpine aire food this week, that’s next week!
Enter here:
a Rafflecopter giveaway<a href=”http://rafl.es/enable-js”>You need javascript enabled to see this giveaway</a>.

Buff USA Merino Wool Buff – Gear Review

As seen on Survivor™ on CBS® (…and now also on www.TheOutdoorAdventure.net! )

“Seamless, multifunctional headwear was first established with the all-season Original Buff®. It’s the most versatile, simple and effective article of technical clothing you can own. Made from seamless 100% microfiber, not only is Original Buff® durable, it’s breathable, wicks moisture and dries quickly too.” Quoted directly from their official website:  www.buffusa.com

Simply stated, Buff® headwear is a seamless tube of fabric that can be worn in an assortment of ways. Be it biking, hiking, yoga, or chasing a toddler through the park, the Buff® is designed to offer technical performance and protection from the elements no matter what your adventure! Those just happen to be the adventures on which I embarked to test the claims of the merino wool Wool Buff®.

So does the Buff® live up to the hype? Well, here’s my opinion:

First of all, I checked out their handy reference guide on their website on How To Wear A Buff. I found it to be very helpful, especially with the more tricky options! I messed around in front of the mirror for a little while to familiarize myself with the different options, and even put it to the test. Turns out, the “Foulard” is super helpful in keeping long hair out of the way when washing your face. I attempted the “Hair Tie”, but I am not blessed with an abundance of thick luscious hair like the ladies in the shampoo commercials, so it just kept slipping out.


I headed out on a bike ride with my daughter in tow. I rocked the “Helmet Liner”, “Neck Gaitor”, “Face Mask”, “Pirate”, and “Sun Guard” looks. I would like to say I rocked the “Balaclava” look too, but I honestly could not get it to work for me! I attempted the “Hood” as well, but I felt too claustrophobic. My personal favorite way to wear it for biking on a clear, cold, wintery day was definitely the “Face Mask” method. I felt like I could breathe easily, without the uncomfortable lung freeze feeling! I’m such a wimp, I can’t stand that lung freeze feeling. Even when I broke out into a full out sweat, the 100% Merino Wool Buff® didn’t itch or overheat my neck. I’d say their claim of “Natural Microclimate Control” is right on! It stayed put on my face, and didn’t budge — even with my frequent twisting and turning to reassure my impatient toddler that we were only going “a couple more miles.” I think she’s on to me.


We stopped at a park to “get her wiggles out” before the return trip back home. As it turns out, the Buff® can also be a pretty cool cape when tucked in to the back of a toddler’s shirt.


In the evening I wore the Buff® in a modified “Foulard” for my yoga class. I like to wear my hair loose during yoga to avoid any tension of a hair tie, but trying to huff and puff wispy hairs out of my face while in Adho Mukha Svanasana is far from relaxing. I followed the steps to create the “Foulard”, contained all my hair into the tube, and then tucked the back flap underneath the seam at the nape of my neck. Ta Da! No more hair wisps to huff and puff about!


I wore the Buff® in the “Neckerchief” while buying groceries at the local grocery store, and received two compliments on the pattern and style of my “scarf”. So there you go, ladies, with all the many style options available from Buff® you too can be the envy of all those in your local produce isle. The “Neckerchief” is my favorite neutral way to wear the Buff® in this chilly winter weather, because the material is lightweight and breathable I don’t feel the need to take it on and off repeatedly while out running errands. It’s the perfect seam connection between my jacket and the neckline of my shirt. No more frosty breezes sending chills down my spine while loading my enormous haul of grocery bags into the trunk!

On a separate occasion my daughter and I went exploring in a local forest, during which I wore the Buff® in the “Wristband” method. Not gonna lie, the wristband method is super useful for wiping toddler snot when you forget to pack tissues. It’s gross, but it’s legit. In my defense, I had to test out how well the Buff® held up in the laundry anyway! I’m happy to report that my Buff® is snot-free, odor-free, and looking good as new! (Don’t worry, it’s not the same Buff® included in any of our giveaways…)


So, there you have it. Thanks again to Buff® for the opportunity to review the merino wool Wool Buff®!

Have you tried the Buff® before? Any tips on alternate ways of wearing it? We would love to hear from you so comment, tweet, and share on Facebook!


Reviewed By:
Tabea B
The Outdoor Adventure Team

Beyond Coastal Sun Care – Product Review

Always on the look out for a more natural and safer sunscreen for myself and my children, I was thrilled that Beyond Coastal gave me a chance to review some of their products.

I have tried a number of brands in the past but Beyond Coastal is definitely one of the best that I have tried so far.

They gave me Active Sunscreen SPF 30+, Natural Clear SPF 30, Active Face Stick, Natural Lip and Face Screen SPF 30, and a variety of flavors of their new line of flavored lip balm to try. Here are my thoughts:
Active Sunscreen SPF 30+

This sweat and water resistant, non-mineral broad spectrum UVA/UVB protection sunscreen is gluten free (great news for my son) and also free of all those nasty oxybenzone, paraben and petroleum stuff which, though not conclusively proven, has me worried about what chemicals and toxins are entering my body through my skin.


So it doesn’t contain any of those nasty chemicals, so what does it contain? Healing aloe vera, revitalizing green tea, nourishing Vitamins C and E, moisturizing shea butter, soothing yerba mate, hydrating panthenol and algae extract is enough to make any skin happy. The sun protection (active ingredients) come from octinoxate, octisalate (that gives it that lightly sweet scent), octocrylene and avobenzone (which protects against UVA rays). Ocinoxate makes up the majority of the active ingredients at about 7.5% and avobenzone makes up only 2%.


I liked that it has no noticible scent and that it applied invisibly to my skin and after 5 minutes when I checked again, it was almost unnoticeable. No white residue.


As some of the active ingredients (such as Avobenzone) start to degrade within an hour when exposed to UV rays, Beyond Coastal added Solistay to prolong and stabilize its effectiveness. As I burn easily, I will be curious to try it this summer and find out how effective it is at keeping my fair skin from turning an unflattering strawberry color. I like this sunscreen because of how quickly it disappeared on my skin, how a little went a long way, that it had no scent and that it was water resistant. I am not wild about the fact that it still contains octocrylene (4% of the active ingredients) which some studies have linked with increased incidences of malignant melanoma.

Natural Clear Sunscreen SPF 30
If your plan for the day is to cheer on your favorite team, a stroll in the park with your best friend (be it four footed or two) or taking a spin in a convertible then this is the sunscreen of choice. It is a good everyday sunscreen which one can easily apply makeup over it without the makeup caking and no one will know that your skin is protected (even without makeup).

What makes Natural Clear Sunscreen a good every day sunscreen is that it only has one active ingredient (the very safe and non-toxic zinc oxide). It also nourishes your skin with rose hip oil, jojoba seed oil and shea butter.It repairs and hydrates with cococa seed butter, alpha lipoic acid (an anti-oxidant), pro vitamin B, algea extract, and aloe vera.


Fragrance free like the other sunscreens, it has only a very faint sweet smell. The zinc oxide sits on the skin’s surface and is not absorbed into the skin while protecting the skin from both UVA and UVB ultraviolet rays and is not destroyed by the sun like some other sunscreen ingredients.


I like this sunscreen because it absorbs so quickly into the skin and leaves no noticeable residue while still giving my skin powerful protection against the sun. I also love the active ingredient list. Even though the sun protection will rub off with a towel, wash off while swimming, and sweat away when exercising, I think the hassle of frequent application is worth it because of the lower risk of strange (and potentially harmful) things being absorbed into the skin.

Natural Lip and Face Screen


I did not like the Natural lip and Face Screen. Even after 10 minutes there was still a noticeable white sheen on the skin. It has a very light, hardly noticeable scent and comes in a tub which meant that the sunscreen got under my nails.
The active ingredients are in equal amounts Titanium Dioxide (which does get absorbed into the skin) and Zinc Oxide (which stays on the surface of the skin). For moisturizing and hydration of the skin there is aloe vera, coconut oil, safflower oil, Vitamin C and E, Shea butter, beeswax and Mango butter.


Like the other sunscreens by Beyond Coastal it is gluten free, and Paraben and Petroleum free. It offers strong UVB and UVA protection but I still prefer Natural Clear Sunscreen SPF 30+.

Active Face Stick

The Active Sunscreen Face Stick’s biggest advantage is that one can apply it without getting one’s hands greasy. It comes in a stick form (kind of like deodorant) and is great for people who don’t want their hands to be slippery every time they apply sunscreen. One could apply this sunscreen half way up a cliff face and still be fine to keep on going.


It has a pleasant unobtrusive scent. Easy no-mess application, no drip, no sunscreen in the eye, no inhalation (like with spray-ons) and no greasy fingers.


After 10 minutes the face still felt sticky and greasy to the touch (but not more so then most normal sunscreens).


The active ingredients are Avobenzone, homosalate, octinoxate and octocrylene (boo!). It nourishes and hydrates with aloe vera, Vitamin E, Beeswax, shea butter, yerba mate, and orange oil extract (which gives it a light hint of citrus scent).


If I was in any sort of active sport which would make slippery hands dangerous then I would use this product. It is water and sweat resistant and oxybenzone, paraben and petroleum free but it still contains octocrylene which turns me off.

SPF 15 Active Lip Balm


Coming in four fun flavors (Citrus Grove, Mint Leaf, Cherry Blossom, and Vanilla Bean) these Active lip balms nourish and hydrate (beeswax, aloe vera, shea butter and yerba mate) while giving your lips protection (octinoxate, octisalate, octocrylene, avobenzone) against UVB and UVA rays. I normally don’t go for scented lip balms as I find them too cloyingly sweet but that was not the case with this brand. Applied to dry, slightly chapped lips it instantly gave relief and moisturized my lips leaving them feeling luscious. They stayed on even after drinking some tea and giving my husband a kiss (he didn’t mind the scent either). It left my lips feeling smooth and not sticky and kept them soft throughout the day.


by Thamar A.
The Outdoor Adventure Team


Products provided by http://www.beyondcoastal.com/

Spring Into Adventure Gear Giveaway! Cold Week Giveaway!

You’ve been waiting, I’ve been waiting, we’ve all been waiting for this moment! That’s right, Today is the day that we kick off the first giveaway in our Spring into Adventure Gear Giveaway!


For the last couple months, We at The Outdoor Adventure along with in no particular order: My Life OutdoorsWilderness DaveA Little CampyHiking the Trail and Trail Sherpa have been working together with a whole bunch of outdoors companies to bring all you guys more than a month of giveaways. 


This week, our COLD Week, 2 People will walk away… from their computer… with some awesome REALLY AWESOME gear. and the rest of you? well, you’ll just be more excited to win the next week’s Gear Giveaway!


As a reminder, here’s what’s up for grabs:

Grand Prize:
Polarmax Comp Tech 4 Fleece Base Layers – REVIEW HERE
Minus 33 Wool Balaclava – REVIEW HERE
Beyond Coastal Travel Kit – REVIEW HERE
Alpine Aire Food Kit – REVIEW HERE
Yodel App – REVIEW HERE – AND HERE 

Second Place Prize:
Goat Head Gear – Sole Spikes – REVIEW HERE


a Rafflecopter giveaway<a href=”http://rafl.es/enable-js”>You need javascript enabled to see this giveaway</a>.

Polarmax Comp 4 Tech Base Layers – company profile and review

Have you heard of Polarmax? They’re a North Carolina based producer of Performance Base Layer gear.  Working with a variety of different materials and their own technology they’ve produced baselayers that are meant to help suit our various base layer needs. They categorize them as warm, warmer and warmest too so you know what to expect and what will be best for your climate/outdoors activities. That was important for me when I contacted them about some base layer gear for my summit attempts this summer on some 20 000+ foot peaks in Bolivia. I didn’t wan’t to be caught out in the cold… literally so I did my research and this is what I found:

First of all I was impressed with their Made in USA approach. Polarmax manages the whole process of making the base layers; from design to testing to manufacture to sales and marketing to distribution and customer service, they know what’s going on… and more than that, they keep it green. Everything is done within in a 15 mile radius. From fabric production, to manufacture to warehouses, everything is kept close together. This means less impact on the environment and more jobs and business kept within the country. As an addeds bonus, it helps keep costs down for you and me as well.


Polarmax knows that one base layer doesn’t suit all conditions. Because of that, they put their layers in three categories: warm, warmer and warmest. Choose your adventure and choose how warm you need to be. Spring, summer, winter or fall, they’ll take care of you.


Synthetics are good for breathing and moisture wicking, to top that all off they improve it with their 100% Acclimate Dry Performance Fabric. Some people complain that synthetics can get smelly. OK, better said, some people say that they get smelly in synthetics. To help combat the problem of the smelly hiker / climber / snowboarder, etc, They include a scent prevent protection which as anti-microbial and has anti-odor protection.


If you’re into extreme winter sports like mountaineering you should check out their fleece base layers for those really extreme climates. They use a soft microfleece and flat seam stitching (used on all of their gear) and 10% spandex to give you a more comfortable fit that moves with you while you’re staying warm. The last thing you want to worry about is itchiness and uncomfortable seams!


Polarmax sent me a set of COMP 4 TECH fleece base layers (PMX Hoodie and matching tights) for me to test out. I haven’t been able to put them through their paces yet to give an effective review, but i’ll be getting out in them and putting them through their paces soon. Stay tuned for some long term and more detailed reviews, including how well they hold up on my 20000+ foot summit attempts this summer in South America.

Want your own set? watch for this Thursday’s post where we giveaway a set of sweet COMP 4 TECH FLEECE PMX Hoodie and matching COMP-4 base layer bottoms (just like the ones they sent me!).

Spring into Adventure Gear Giveaway Announcement:

If you’re finally thawing out from the winter or still looking for that last remnant of ice and snow, this is for you. Technically it’s spring and we want you to Spring into adventure with us. Did you see what I just did? Did you catch that clever play on words? Of course you did, but now you just want me to get on and tell you why this is important:

For the last couple months, We at The Outdoor Adventure along with in no particular order: My Life Outdoors, Wilderness Dave, A Little CampyHiking the Trail and Trail Sherpa have been working together with a whole bunch of outdoors companies to bring all you guys more than a month of giveaways.

That’s right, every week, starting March 15th, we’re going to be starting a new giveaway with an awesome prize package! Each week we have a new theme and a whole bunch of gear to offer to 2 happy peeps in North America.
Get yourself hyped by checking out the prizes below, start following our blogs so that you’re the first person to know about that weeks giveaway and read the upcoming reviews on the blogs so you can start imagining where you’d use this awesome gear! I counted 39 prizes; that’s pretty slick!
Here’s the rundown:
March 15th COLD Week
There is still snow up in those hills and we know it. Plus, if you’re planning to get in a summit attempt or two this summer then you definitely want to check this out.
Grand Prize:
Polarmax Comp Tech 4 Fleece Base Layers
Minus 33 Wool Balaclava
Beyond Coastal Travel Kit
Alpine Aire Food Kit
Second Place Prize:
Goat Head Gear – Sole Spikes

March 22nd SURVIVAL Week
This kit will set you well on your way to surviving outside longer. Don’t believe me? Check this out:
Grand Prize:
Adventure Medical Kit Ultralight Watertight 0.7 oz Med Kit
Adventure Medical Kit Origin Survival Kit
Gerber BG Survival Parang
Beyond Coastal Travel Kit
Buff USA Merino Wool Buff
Innate Storage Sack
Second Place Prize:
March 29th Sea to Summit Week
I know, you’re already salivating. Salivating over the prospect of getting your hands on awesome backpacking gear from Sea to Summit’s (including their new 2012 line that literally just came out), plus a merino wool buff, Alpine Aire Foods dehydrated meals, and Beyond Coastal products! 
Grand Prize:
Sea To Summit Ultra-Mesh Stuff Sack
Sea To Summit Ultra-Sil View Dry Sack
Sea To Summit Ultra-Sil Sink
Sea To Summit Ultra-Sil Bucket
Beyond Coastal Travel Kit
Buff USA Merino Wool Buff
Alpine Aire Food Kit
Second Place Prize:
Sea To Summit Ultra Nano Dry Sack
April 5th Digital Week:
I know, you’re the tech type. You get outside and you like to put it on the web for all to see. This is a cool mix of both worlds that will give you that extra motivation to document those trips and share them with the world!
Grand Prize:
A free Sherpa Site for 1 year
Yodel App
Buff USA Merino Wool Buff
Second Place Prize:
April 12th Backcountry Week Finale
You’re not satisfied with 4 weeks so we give you 5 weeks of giveaways. We’re rounding it all off with our biggest prize package yet. Probably enough to share with a friend… but that’s up to you.
Grand Prize:
Sports Science Hybrid Clothing
Merrell Shoes via the Nature Shop
GearPods Backcountry Kit
Trek Light Double Hammock with Hanging Kit
Gerber Octane
Beyond Coastal Travel Kit
Alpine Aire Food Kit
Second Place Prize:
Merrell Shoes via the Nature Shop

Gear Review: Golite Cave 2 Shelter

If you’ve been looking to lower your pack weight, you’ve probably heard of Golite. If not, have you seen Andrew Skurka’s new book? That pack on the front is made by them. As their name insinuates, they sell lightweight backpacking gear that helps you go… light. Last year for my birthday my wife agreed to let me buy a second hand shelter setup, a Golite Cave 2 silnylon tarp and a Golite Lair Nest mesh-tent.


As a family man now, I was looking for something we could take out and use that didn’t weigh a lot. For a small group, this is it. Using the mesh tent, I can get 3 adults at a tight squeeze. With just the tarp, I’ve fit two adults and our three kids with space to spare. And weight?  The tarp weighs in at 19.5 ounces and the mesh tent at just under 26 ounces. That’s under 3 lbs for the set. To help keep the weight down it relies on trekking poles or sticks found in the area to set it up.

Golite Cave 2 Specs
  •  SilLite™ silicone-impregnated ripstop nylon: ultra-lite, ultra-tough, ultra-waterproof
  •  2 beaks
  •  Lots of tie-out points
  • Compatible with both Lair Nest and Lair Nest 2
  •  3-season, 3-person
  • Area: 89 sq ft / 8.3m2
  • 19.5 ounces

<A HREF=”http://ws.amazon.com/widgets/q?rt=tf_cw&ServiceVersion=20070822&MarketPlace=US&ID=V20070822%2FUS%2Fsurvi0d-20%2F8010%2F191411f7-5575-4c1c-a005-b2ff14c3fff2&Operation=NoScript”>Amazon.com Widgets</A>

My Thoughts – the Good
  • It’s a really light and super compressible.
  • It takes up almost no space in my pack.
  • It can be set up in a whole bunch of ways to suit the weather and group size.
  • The tie-out points on the sides really allow for a nice cave-like setup that gives a lot of space to move, even while pitched right to the ground.
  • Being able to pitch flat to the ground is a huge bonus
Pitched with poles underneath on a trip this summer. We had 3 guys inside with the nest.
My thoughts – the not so good
  • Trying to pitch it by one’s self is a real pain.
    • I found it easiest to peg out the sides first and then set up the poles for the ridge.
  • The tie-out points are small and weak. Mine was used and the corner points are worn half through.
  • The beaks can only be pitched tight at one angle, otherwise they flap. Not a big deal, but when it is advertised as having any type of setup that you want, it makes it a draw back.
  • It says it is compatible with the Lair 2 Nest, but I find the Lair 2 Nest is a bit too wide at one end to use when pegging the tarp near the ground.
  • Too many tie out points!
Again, pitched with poles inside on a trip last summer with my daughter.
As you can see, here it was pitched right to the ground because of wind and cold.
Overall Thoughts


I honestly really like this shelter a lot. It is my first tarp setup and I find the flexibility of using it solo or with the Nest great. The two take up very little space and using the trekking poles is a great way to save weight that otherwise would have been wasted on tent poles. It’s frustrating to have to carry so many tie out points, but I’m probably going to go Titanium in the next little while and cut down some weight there.

I’ve taken it out a few times and as a 3 – season shelter for 2+ people it’s great. I definitely recommend the nest if you’re going to be hiking where there are mosquitos.


All in all I’d give a strong recommendation to Golite shelters, especially this setup.

<A HREF=”http://ws.amazon.com/widgets/q?rt=tf_cw&ServiceVersion=20070822&MarketPlace=US&ID=V20070822%2FUS%2Fsurvi0d-20%2F8010%2F191411f7-5575-4c1c-a005-b2ff14c3fff2&Operation=NoScript”>Amazon.com Widgets</A>

Gear Review: Jetboil Zip

I have long rejected the thought of cooking ‘systems’ in preference for the flexibility afforded when I can pick the pot and stove best suited for my trip. The Jetboil Zip, and by extension the whole Jetboil cooking system has challenged that preference with an efficient and well-designed system demonstrated in the Jetboil Zip.


The Jetboil Zip is generally designed around the thought that in the backcountry you will mostly be eating freeze dried food, and so its principle use is that of boiling water.
 
Fully-loaded (Fuel and all accessories), the Jetboil Zip weighs in at 560 grams, or 20 oz. Without fuel you start with 370 grams / 13oz.  The cup has a capacity of 800ml (27 fl oz) and the system maintains compatibility with all of other systems in the Jetboil family. The inside of the cup has measuring lines up to 500ml, perfect for most freeze dried meals. This makes the Jetboil Zip system perfect for a single individual as you are easily able to boil water for your food and a bit extra for that cup of tea you may need.
 
One of the particularly nice features of the Jetboil Zip system is its efficient use of space in your pack. Within the 800ml space you are able to fit the stabilizer tripod, stove, fuel (100 gram Jetboil fuel), and a pot stand. The lid features a spout for sipping/pouring as well as a strainer. The bottom of the cup has the standard Jetboil Flux Ring (a build in heat exchanger / windscreen) and a protective cap that doubles as a measuring cup. If that seems like a lot to fit together the insulating cozy has a diagram indicating the order everything fits. For a tiny weight savings, if you are not bringing another pot you can leave the pot stand at home.


Putting the Jetboil together is relatively easy. The pieces are all straightforward to assemble and you can tell quickly what goes where. Using the stabilizer tripod is a little cumbersome, though probably useful of you are on uneven ground. As well, getting the cup on to the stove itself can be a challenge when having to line up the slots. Granted this was my first time using it. I’m sure with time there is a certain intuition that helps get everything lined up properly.
 
The stove is well built and of solid construction. The Jetboil Zip stove requires you bring a lighter or matches (which are probably good to pack anyway) and has very good heat output. It has a ring that fits around the bottom of the companion cup and is designed to minimize exposure to wind, relying on the flux ring and metal supports to either deflect or slow with wind enough that it maximizes heat being applied to the cup. It is not the best windscreen, but it is far better than cooking without a wind screen at all. The control knob allows decent flame control, though its small size would make it difficult to use with gloves.
 
The Jetboil Zip has an advertised boil time of 500ml in just over 2 minutes, 30 seconds. However, living in the Pacific Northwest means that there is a vast variety of conditions that may be encountered.  I took the Jetboil to the park where the temperature was about 7 Celsius/45 Fahrenheit with the goal of boiling 500ml of ice cold water. In only very mildly breeze conditions and on slightly uneven ground the Jetboil Zip took the water from very cold to a rolling boil in 3 minutes 25 seconds. It feels like hardly a wait if you start another activity while you’re water is boiling.
 
At the end of the day I found the Jetboil Zip to be a decently made and highly efficient product that has convinced me of the usefulness and efficiently of the Jetboil system in the backcountry. Boiling water is probably the most common activity and this stove does a great job of it. The 800ml capacity is perfect as it fits everything one person needs in a nice compact space. I found that the control knob, stabilizer tripod, and the task of getting the cup on to the stove are a bit finicky, but with a bit of practice I would expect it would get better. For a simple, no frills, and yet highly efficient stove, you cannot go wrong with the Jetboil Zip. However, if you are looking for a few more features, I would strongly consider the Jetboil Sol system as it is a similar size but with easier flame control, piezo ignition, and a little less weight.
 
Summary:
 
Pros:
         Reasonably light – weight
         Compact stove
         Very efficient at boiling water
Cons:
          Flame control knob is small
          Cup and stabilizer tripod are finicky
 
The final verdict:
A well-built, compact and efficient stove that performs well for a single person, but lacks a number of features possessed by other members of the Jetboil family.

Prepared by Graeme A.

This Jetboil Zip was borrowed from Chris Pund at http://www.thegearhouse.com. As always, opinions are those of the writer and are the same recommendations we’d give close friends.

DIY: Make that sleeping bag lighter

A few days ago I tried to make a brief case for backpacking quilts. The idea is this: any insulation that you lie on doesn’t insulate very well. If it doesn’t insulate it’s wasted space and weight in your pack. Of course if you wiggle around in your sleep you’ll need to have that insulation, in case you roll over. If not, I’ve got a cool project.

bag with all seams removed
on the bottom

I picked up a sleeping bag using points collected from a store that although a “technical” bag, was a bit bulky for my tastes. It’s a 0 C (32 f) bag, but because it uses cheaper hollow fiber insulation it is heavy. Over 3 lbs. I decided to use it as a practice project on saving weight by removing all insulation on the bottom of the bag and replace it with a pocket for a custom cut closed cell foam pad. My future plan is to take a down bag and shift all the bottom insulation to the top to not save weight, but make it warmer.

I cut right above the shoulders
to be able to slip the pad in.

In the end, I cut off 5 ounces from the bag and 1 ounce from the sleeping pad. This was in a bag that already only had half the insulation on the bottom (as a technical bag, the maker understood the waste of insulation on the bottom.) In a normal bag you could probably save double that.

My suggestion is to start by weighing the bag and pad and measuring how large it is in a compression sack so you can tell how much you saved.

Here’s what I needed to do that:

  • sleeping bag (mummy)
  • closed cell foam pad.
  • scissors – to cut open the bottom of the bag to get access to the insulation and to cut the sleeping pad.
  • seam ripper – to remove horizontal seams and separate the insulation from the fabric.
  • marker – to trace the shape of the bottom of the bag onto the sleeping pad.
Here’s how I did it (Instructions below the video)
  1. On the bottom of the bag there should be two layers of fabric (inner and outer). Cut a horizontal line from one side to the other of the inner fabric just above shoulder height.
  2. Remove the horizontal seams from the bottom of the bag (ONLY the ones that hold the insulation in place).
  3. Carefully cut the insulation out from between the layers , leaving the bottom 10-12 inches of insulation in place to provide a foot box to keep your feet warmer.
  4. Place the bag on top of your foam pad.
  5. Trace the bottom seams of the bag on the foam pad. Make sure it will be snug along the bottom so as not to let air in the pad.
  6. Cut the foam pad along the lines.
  7. Slide the pad into the bottom of the bag.
  8. Weigh the final results and note the size. Oh and post below with how it went!
2.9 lbs, Compressed: 8″x10″