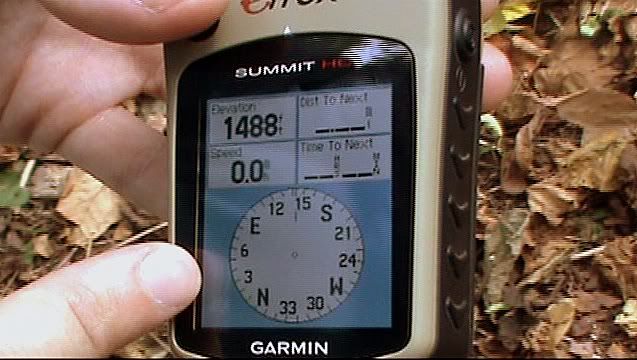
As an avid hiker, climber, and backpacker, I have quite a collection of outdoor gear. My closet is filled with ropes, backpacks, cookware, hiking poles…basically everything one would need for an outdoor adventure. Some things I don’t get much use out of–for example, I’ve got an ice ax in there somewhere that hasn’t seen action in three years. However, there are other things that I find so useful that I never enter the woods without them. One such tool is the subject of today’s article–my handheld GPS receiver.
As the owner of a GPS rental service, I have lots of experience helping people learn how to use handheld GPS units for outdoor activities. I have found that most people aren’t aware of just how useful a handheld GPS unit can be. Even people who have owned one for years often are not getting full use of the unit’s capabilities. In today’s post, I’ll cover the best ways to use a handheld GPS unit for a typical hiking or backpacking trip, from the planning stages to the post-trip sharing of your experience.
Planning the trip
The trip planning stage is very important when using a handheld GPS unit, and it’s often one that many people skip–which is why they’re not getting full use out of their GPS. It’s during the planning stage that you’ll load any maps, waypoints, routes, or tracks on your GPS unit that you think might be helpful. For example, for a typical short backpacking trip, you’d want to create waypoints at the start and end of the hike, your planned camping spots, water sources, trail intersections, etc. Most GPS manufacturers provide free computer software that you can download to assist in this process, so that you can do all the planning on the computer and then simply transfer the information to the GPS.
There are many excellent websites, such as Backpacker.com and Trailheadfinder.com, where you can download routes, tracks, and waypoints for many trips that other people have already posted. Many free GPS maps are also available at sites like the GPS File Depot.
Taking the trip
At the trailhead, activate the route you’ve loaded on the GPS, or select the first waypoint you’ll be navigating to. As you hike, keep the GPS clipped to a belt or shoulder strap on your pack so you have access to all the information it will give you. Using the GPS, you’ll be able to see how far you have to go until your next waypoint, and how long it will take you to get there at your current rate of travel. You’ll also be able to see how many miles you’ve covered, what your average speed is, your time moving vs time stopped (i.e, rest breaks), altitude gained and lost, and much more.

By looking at the map page, you’ll be able to see at a glance where you’re at, what terrain features are nearby, and what’s coming up around the next turn or over the next hill. It greatly increases your situational awareness, and gives you the information you need to make decisions. For example, let’s say you’re trying to reach your next campsite by a certain time. Your GPS will give you a constantly updated ETA, so you’ll know if you have time to stop and enjoy the scenery, or if you need to increase your speed to make it on time.

After the trip
At the end of your hike, you can save your track on the GPS unit, so that you can share it with your friends or post it on-line for the benefit of other hikers. Also, if you’ve taken pictures on the trip at locations where you created waypoints, you can geo-tag those pictures so others can see exactly where they were taken (GPS units with built-in cameras automatically do this for you). Finally, you can review your stats for the trip to see if you really traveled as far, climbed as high, and moved as fast as you thought you did
Now, a handheld GPS unit is not a substitute for a paper map and compass. You should always carry those with you, and know how to use them. However, when used correctly, a good GPS unit will give you the confidence you need to take your outdoor adventures to the next level.
 The Outdoor Adventure Giving you tips, tricks & recommendations to help make adventuring in the Outdoors fun, safe & exciting for you and your kids.


